
If you want to add a polished look to your Pinnacle Studio projects, try adding some effects to your picture-in-picture windows. In this tutorial, we will show you how to enhance a basic-picture-in-picture with pan and zoom effects, color corrections to match the vibrancy in both clips, and adding a custom motion path using keyframes.
Thanks for watching! You will find a written version of this tutorial below, and a printable PDF copy to download on the Download resources tab above.
Download a FREE 15-day trial and discover all the essential and advanced video editing features that Pinnacle Studio delivers to make your videos look their best.
Download these free resources:
Written tutorial (PDF, 892 KB)
Sample project 1 (Zip file, 21.1 MB)
Sample project 2 (Zip file, 37.1 MB)
What’s new in Pinnacle Studio
Effects, filters and transitions
Intermediate and advanced techniques
Featured products
 Pinnacle Studio 26 Ultimate
 Studio Backlot Membership
 Pinnacle Studio 26
 Vision FX
Advanced picture-in-picture effects
This tutorial will demonstrate how to add effects to picture-in-picture windows, such as pan and zoom, color corrections, and custom motion.
Click on any of the images below to view full-size.
How to add pan and zoom to a picture-in-picture window
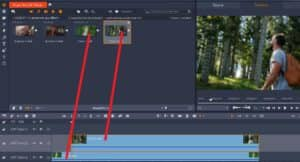
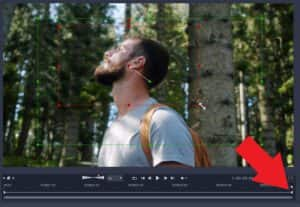
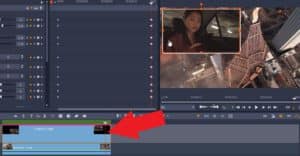
In this first example, we’ll add a picture-in-picture window of a man on a nature hike over top of this scenic video.
- Add your background video to A/V Track 3.
- Drag the video you want to use as a picture-in-picture window onto A/V Track 2 so it layers on top of the background video.
To resize the picture-in-picture window, click on the video clip on A/V Track 2, and then select the Scale Mode icon under the preview pane.
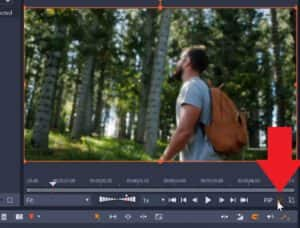
- Drag on the nodes to resize the window and make it smaller.
- Click and drag the picture-in-picture window to your desired position.
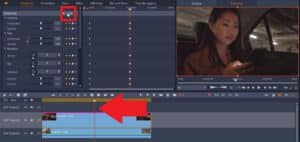
To add a pan and zoom effect to the overlay:
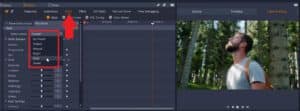
- Right-click on the clip on A/V Track 2 and select Pan and Zoom.
- Select Animated.
You can choose from any of the animated pan and zoom presets from the dropdown menu.
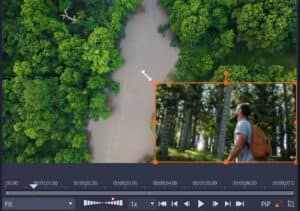
You can also customize the pan and zoom effect exactly to your liking. The green frame is where the camera will start, and the red frame is where it will end.
- Use the nodes on the green frame to adjust the starting point.
- Click on the end keyframe and adjust the red nodes to your desired position of the final frame, then click OK.
Press play to preview what the picture-in-picture window with the pan and zoom effect looks like with your background video.
How to adjust the color of picture-in-picture windows
You can make some adjustments to the color of the picture-in-picture window to ensure it matches your background video.
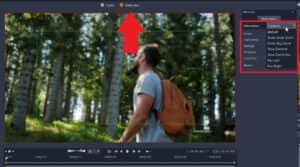
- Click on Editor.
- Then click on the Color tab to make some adjustments to the overlay color.
This will be useful if your overlay clip doesn’t match the color tones of your background, for example, if the background is really washed out and the overlay is really saturated.
- For this example, select the Vivid preset so the overlay better matches the vibrant background video.
- Adjust the color grading controls to get a perfect match.

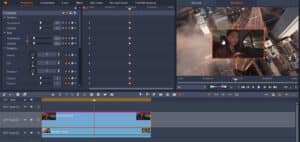
How to add a border to a picture-in-picture window
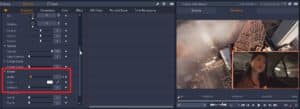
In this next example, we have a video of a woman using a smartphone as the picture-in-picture window on top of an aerial video of a city. A simple effect to create more visual impact is to add a border around the picture-in-picture window.
As before, select the overlay clip on the timeline and then click on the Scale Mode icon to resize and reposition it. To add the border:
- Click on Editor, then select Properties.
- Scroll down to Border.
- Increase the width of the border and choose a color.
How to customize the motion of picture-in-picture windows
Now we will show you how to add movement to your picture-in-picture windows.
Basic technique: from corner to corner
From our last example, the picture-in-picture window is positioned in the bottom right corner and we will make it move to the top left corner.
- Click on Editor, then select Properties.
- Turn on keyframing by clicking the diamond icon.
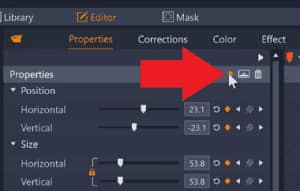
- Drag the playhead on the timeline to the end of the video.
- Then click and drag the overlay to the top left corner.
Click play to see the picture-in-picture window move from the bottom right-hand corner to the upper left-hand corner as the video plays.
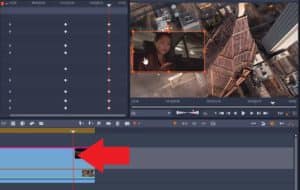
Advanced technique: adjusting position and size
In this example, we’ll make the picture-in-picture window go from full screen at the start and shrink to the middle of the screen and then move across to the left.
- Right-click on the media clip on A/V Track 2 and select Reset Properties to remove the corner to corner movement. This will also make our picture-in-picture window full screen size again.
- Drag the playhead to the middle of the video.
- Turn on keyframing by clicking on the diamond icon.
- Drag on the nodes on the preview pane and shrink the size of the picture-in-picture window and position it in the center.
- Drag the playhead towards the end of the video then click and drag the overlay to the left.
Press play to preview and you’ll see how the image shrinks into the middle of the video clip and then moves to the left.
These are a few of the ways you can enhance your videos by adding effects to picture-in-picture windows!
Download a FREE 15-day trial and discover all the essential and advanced video editing features that Pinnacle Studio delivers to make your videos look their best.
