In this written tutorial, CorelDRAW Master Stefan Lindblad shares his tips and techniques for creating a pixel art illustration in PHOTO-PAINT. Click on the Speed Drawing tab to watch this illustration come to life!
Thanks for watching! We hope you found this tutorial helpful and we would love to hear your feedback in the Comments section below. You will find a written version of this tutorial below, and a printable PDF copy to download on the Download Resources tab above.
Watch the illustration come to life in this speed drawing video!
Thanks for watching! We hope you found this tutorial helpful and we would love to hear your feedback in the Comments section at the bottom of the page. You will find a written version of this tutorial below, and a printable PDF copy to download on the Download Resources tab above.
Start your FREE 15-day trial and embark on a design journey with powerful tools for vector illustration, layout, photo editing, typography, and collaboration.
Download these free resources:
Written tutorial (PDF, 1 MB)
CorelDRAW Graphics Suite resources
Quick Start Guide (PDF, 2 MB)
Keyboard Shortcuts (PDF, 3.5 MB)
CorelDRAW and Corel PHOTO-PAINT user guides
For CorelDRAW Graphics Suite subscription and perpetual licenses (2018 to 2024), languages include English, Português do brasil, 简体中文, 繁體中文, Čeština, Deutsch, Español, Français, Italiano, 日本語, Polski, Русский
CorelDRAW Community
CorelDRAW learning center
Facebook
X (formerly Twitter)
YouTube
PHOTO-PAINT Projects
Introduction to PHOTO-PAINT
What’s New in CorelDRAW Graphics Suite
 CorelDRAW Graphics Suite
 Ultimate Vector Bundle Vol. 1
 CorelDRAW Standard 2021
 Ultimate Vector Bundle Vol. 2
 Corel Vector
Creating a Pixel Art Illustration in PHOTO-PAINT
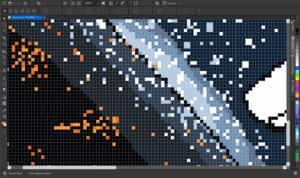
Pixel Art is a very popular drawing and illustrating style. It goes back to how the old computer games used to look – Space Invaders, anyone? Its previous limitations are now its biggest advantage and reason for being – individual pixels create a sharp, pixelated look.
Even if you made a large draft in a sketchbook, you still start any pixel art image in a very small image size. So small you can clearly see the pixels grid. And when finished with the image, you resample it to a larger size which is usually not done when working with digital painting, photos and illustration.
This means that if you intend to create an illustration for a printed magazine or large format canvas, billboard – or any type of screen, you plan your image and follow the basic rules and it will be fine.
Click on any of the images below to view full-size.
Planning your Pixel Art Illustration
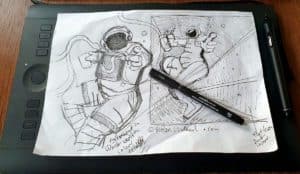
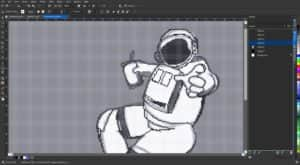
Before you start creating your pixel art, it is helpful to create a sketch or draft first. You can sketch on paper with a pen or use a digital pen in PHOTO-PAINT. Import your sketch into a new document and when the draft is no longer needed you can simply delete the draft object.
Document Setup
Create a new document (go to File > New or use Ctrl + N). In the Create a New Image dialog box, set the units of measure to Pixels, and for this tutorial I am using an image size of 150 x 150 pixels. You can choose 72 dpi or 300 dpi or any resolution you prefer. Click OK.
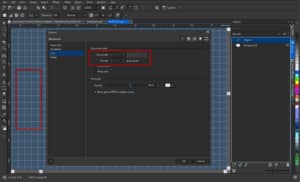
The Document Grid is an invaluable tool when creating pixel art and you can adjust the grid settings to make it easier:
- Under the View menu, make sure both Rulers and Grid are enabled.
- Right-click on the ruler and choose Grid Setup.
- Change the horizontal and vertical numbers to 1.
- Enable Snap to Grid and Show Grid.
- You can also adjust the opacity and color of the grid if you like.
- Click OK.
By changing these settings, you will have a grid that shows exactly where the pixels are, and you don’t have to always zoom in to 800% to see where the pixels are.
Drawing Tools and Techniques for Pixel Art
I suggest you use a digital pen tablet or stylus pen to create your pixel art illustration. You can use a mouse, but a digital pen will always be better for accuracy and speed.
There are several tools and techniques that you can use to create a pixel art illustration, depending of course on the style of your illustration and your own preferences for PHOTO-PAINT tools and drawing techniques. Here are some tools that are most helpful.
Objects Docker
To open the Objects docker, go to Window > Dockers > Objects. All your objects will be listed here as you create them, and it is an easy way to select and switch between different objects as you are building your illustration.
To create a new object, click on the New Object icon in the bottom left corner of the docker. It is advisable to use multiple objects for different colors and/or elements in your illustration, as this will allow you to easily manipulate, adjust or delete individual elements separate from the illustration as a whole.
If you are using a reference sketch of your pixel art illustration, it will appear as an object in the docker when you copy and paste it into the new document.
In the top right corner of the docker, you can lower the Opacity of the sketch object to make it easier to see your drawing. You can also use the Visibility (eye) icon beside any object listed in the docker to hide the object, and you can use the Delete icon in the bottom right corner to delete your sketch once you no longer need it.
Paint Tool and Eraser
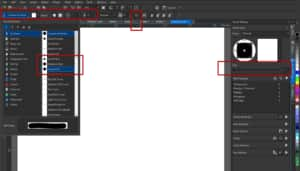
The Paint tool is the main tool I use when creating pixel art. When you activate the Paint tool there are several options on the property bar:
- In the Brush Picker, select a category and brush type (in this tutorial, I used the Art Brush category and Quick Doodler brush type).
- From the Shape dropdown menu, make sure to choose a hard shape without any blur.
- Important! Make sure the Anti-aliasing icon is turned off.
- Disable the Pen attributes (Pressure, tilt, bearing, rotation) as they are not required.
- You can change the Nib Size by adjusting the number on the property bar or by holding down the Shift key while dragging up or down.
TIP: You can also adjust the Paint tool settings by using the Brush Settings docker (Window > Dockers > Brush Settings or Ctrl + F8).
Use the Eraser tool to remove any stray pixels
Adding Color and Effects
There are many ways to add color and effects to your pixel art illustration.
1. When using the Paint tool, simply click on a swatch in the Color palette to paint with a different color.
2. Use the Eyedropper to sample color from your sketch or reference image if you want to match color exactly.
3. I strongly suggest you start with a flat colored background. Simply create a new object and use the Fill tool (F) to fill with your background color. With a colored background the grid will contrast better and be helpful when you start to draw. You can always delete the background object if you don’t need it anymore.
TIP: Remember that you can always change the document grid color to make it easier to see against the background or other colors in your illustration.
4. Use one of the Mask tools, for example the Rectangle Mask (R), to create a selection area and fill it with color or patterns using the Fill tool.

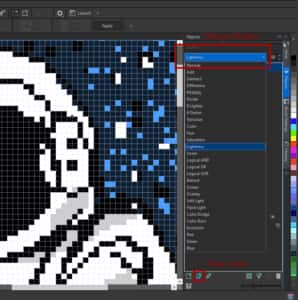
5. Merge Modes alter the way brushstrokes or objects combine with the background or underlying objects. You can create some interesting effects by experimenting with different modes from the Merge Mode dropdown list at the top of the Objects docker.
6. Lenses allow you to apply effects to an object or selected area.
- Select the object that you want to apply a lens effect to or use a Mask tool to define an area to apply a lens effect to.
- Click on the New Lens icon at the bottom of the Objects docker.
- In the New Lens window, select a category and type of effect, then click OK.
- Depending on the type of effect you selected, you will be presented with further options to adjust the effect settings.
NOTE: By using Lenses and Merge Modes in the Objects docker, you work non-destructively, meaning that you can add, remove or modify these effects and your original object(s) won’t be altered.
7. You can choose any of the color palettes you have installed. Just click the Quick Customize (plus) button on the Dockers panel or go to Window > Dockers and choose the Palettes docker. You can also choose to simply go with the 8-bit color palette. Some may say that’s the way to go, while personally, I choose the color palette best suited for my illustration project.
Resampling your Pixel Art Illustration
Once your illustration is complete, you can resize it to meet the specifications of your project.
Go to Image > Resample and enter the new image size and resolution. Select Nearest Neighbor as the mode and click OK. The resampling mode is important here – only Nearest Neighbor will produce clear, sharp results at larger sizes.
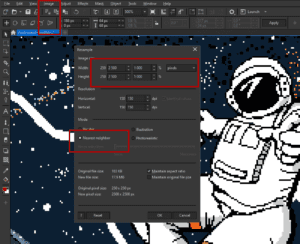
Your illustration now has the size you need, and the pixels are crisp and sharp. Save your image with a new name and the new size and keep the original file. Now with the new size image, choose File > Save As or export with a color profile (RGB, Adobe RGB 1998 or CMYK or Pantone). It all depends on which platform and final product you want for your image.
Adding Text
As an optional step, you may want to add text to your pixel art illustration using the Text tool. In this example, when my illustration was completed, I added the word “Illustration” and my name “Stefan Lindblad” as separate text objects. Then I used the Pick tool and guidelines to align the text.
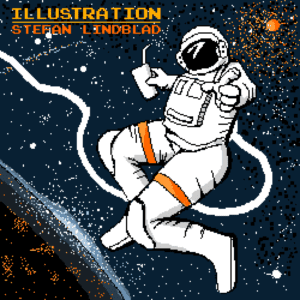
PHOTO-PAINT has tons of tools and effects to let your imagination run wild and free. We hope you found this tutorial helpful and would love to hear your feedback in the Comments section below. Have fun drawing and painting your own pixel art, and share it in our graphic design gallery.
Start your FREE 15-day trial and embark on a design journey with powerful tools for vector illustration, layout, photo editing, typography, and collaboration.

