
See how you can speed up your design workflow using Symmetry Drawing Mode, available in CorelDRAW 2018 and higher. Working on graphics and Illustrations in Symmetry Mode provides users with dynamic new artistic options in the creative process. In this tutorial we will show you how to create a simple mirrored object using a custom artistic media brush, and a more complex graphic element by using multiple symmetry lines. Learn how to add symmetry lines, rotate them and adjust their angles, and how to increase the number of lines to create a kaleidoscope effect.
Thanks for watching! You will find a written version of this tutorial below, and a printable PDF copy to download from the Download resources tab above.
See how you can speed up your design workflow using Symmetry Drawing Mode, available in CorelDRAW 2018 and higher. Working on graphics and Illustrations in Symmetry Mode provides users with dynamic new artistic options in the creative process. In this tutorial we will show you how to create a simple mirrored object using a custom artistic media brush, and a more complex graphic element by using multiple symmetry lines. Learn how to add symmetry lines, rotate them and adjust their angles, and how to increase the number of lines to create a kaleidoscope effect.
Thanks for watching! We hope you found this tutorial helpful and we would love to hear your feedback in the Comments section below. You will find a written version of this tutorial below, and a printable PDF copy to download on the Download Resources tab above.
Start your FREE 15-day trial and embark on a design journey with powerful tools for vector illustration, layout, photo editing, typography, and collaboration.
Download these free resources:
Written tutorial for Windows (PDF, 1.1 MB)
Written tutorial for Mac (PDF, 483 KB)
CorelDRAW Graphics Suite resources
Quick Start Guide (PDF, 2 MB)
Keyboard Shortcuts (PDF, 3.5 MB)
CorelDRAW and Corel PHOTO-PAINT user guides
For CorelDRAW Graphics Suite subscription and perpetual licenses (2018 to 2024), languages include English, Português do brasil, 简体中文, 繁體中文, Čeština, Deutsch, Español, Français, Italiano, 日本語, Polski, Русский
CorelDRAW Community
CorelDRAW learning center
Facebook
X (formerly Twitter)
YouTube
What’s new in CorelDRAW Graphics Suite
Lines, shapes and outlines
Objects, layers and pages
 CorelDRAW Graphics Suite
 Ultimate Vector Bundle Vol. 1
 CorelDRAW Standard 2021
 Ultimate Vector Bundle Vol. 2
 Corel Vector
How to use Symmetry Drawing mode
In this tutorial we’re going explore the Symmetry Drawing mode and designing tool introduced in CorelDRAW 2018. This is a powerful new dynamic and interactive tool that gives us the ability to things we could not do in previous versions of CorelDRAW. We can do illustration in symmetry mode and we can also do design in symmetry mode. In this session I will design the gear graphic and add some flame elements using a custom artistic media brush.
Click on any of the images below to view full-size.

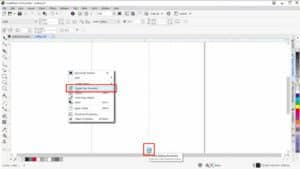
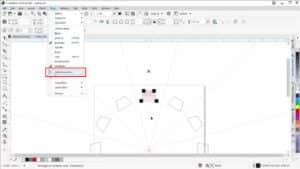
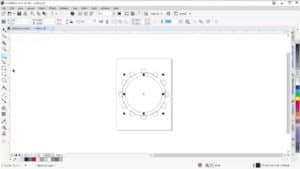
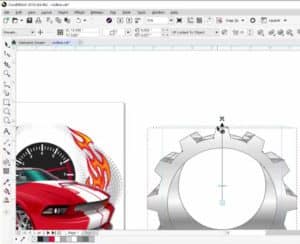
To get started, I set up a second page in my document to work on the gear graphic. On that page, right-click and select Create New Symmetry. You’ll see a mirror line appear and at the bottom is an icon to Finish Editing Symmetry to exit the symmetry drawing mode.
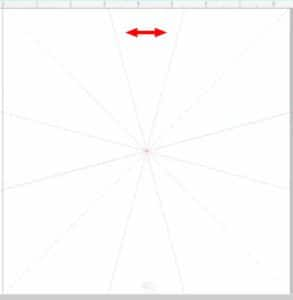
The mirror line has the same properties as the regular guide lines in CorelDRAW. I can click on it to select it and rotate it. I can also hit P on my keyboard to center my mirror line to the page.
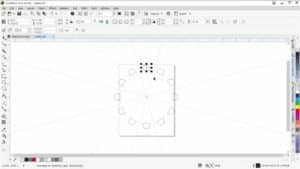
To get started working on the gear graphic, I’m going to change my angle to 15.0 and press Enter. Next I am going to increase the number of symmetry lines to 6.
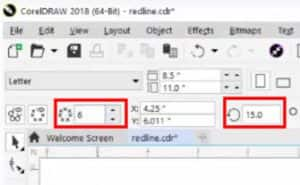
The reason I changed my rotation to 15 degrees is so that the top symmetry mirror will be centered with the page.
To create the gear graphic, select the Rectangle tool, hold down Shift + Ctrl and drag your mouse to create a perfect square from the center.
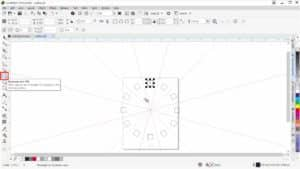
To add perspective, go to Effects > Add Perspective. Again, hold down Shift + Ctrl and drag upwards to add perspective equally to the right and left sides of the rectangle.
Now you have created the gear graphic. To ensure it is centered within the symmetry area, press P on your keyboard to center, then select it and pull it back up to the top of the page, holding down the Ctrl key to constrain it.
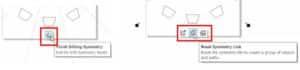
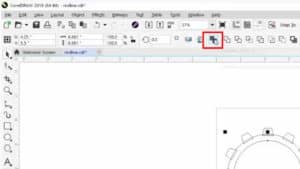
Click Finish Editing Symmetry and then Break Symmetry Link.
Hold down the Shift key and drag to resize it, then press P on your keyboard to center on the page.
Select the Ellipse tool, hold down Shift + Ctrl and drag to create a perfect circle. Press P to center. Hold down Shift as you use a corner scale handle to resize. This will ensure you are scaling perfectly from the center.
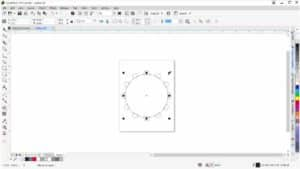
Now hold down the Shift key again, and drag inwards to create a smaller circle, and right-click to duplicate it.
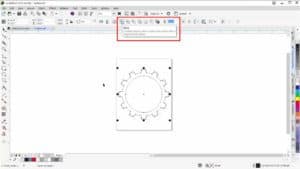
Select the Pick tool, hold down Shift as you select the inner and outer ellipses, then click on the Combine button to combine them.
Press Ctrl + A on your keyboard to select everything then click on the Weld button.
Copy your gear graphic back to Page 1 and paste it over to one side.
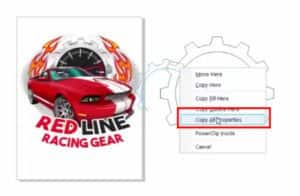
Select the existing gear graphic in the middle of the design. This element already had a metallic fill and we are going to copy that fill onto our new gear graphic. Click on the metallic-filled gear, and drag it over to the new gear graphic until you see the cross arrows and select Copy All Properties.
Delete the original gear graphic in the middle of the design. Using the Extrude tool, select the gear shape and drag your mouse up to add a 3D effect.
There are some lines in here that need to be deleted. Select the Shape tool and double-click on the gear graphic. To delete the line segments, double-click on each one.
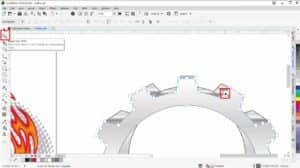
Using the Pick tool, select the gear graphic and resize it smaller, then drag it over to place it on top of the design.
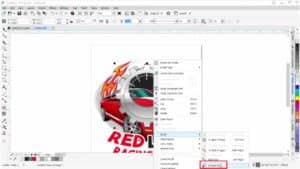
With the gear graphic still selected, hold down the Shift key and select the black RPM graphic in the background. Press C on your keyboard to center. Right-click on the gear graphic and select Order > In Front Of. Now click on the grey halftone background element and that will set the gear in the correct position.

The next part of this tutorial will demonstrate working in symmetry mode with artistic media brushes. The flame brush used in the tutorial is a custom brush not currently available in CorelDRAW. You can use any of the artistic media brushes that you have, in order to get a feel for working in symmetry mode.
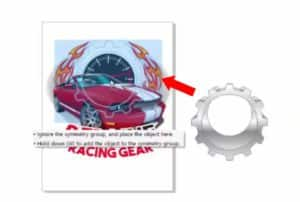
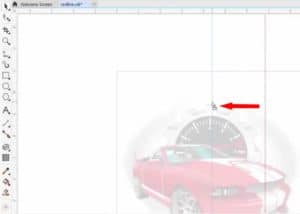
Right-click and select Create New Symmetry. Drag the mirror line into the center of the gear graphic.
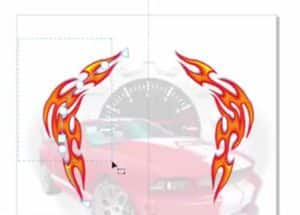
Activate the Artistic Media tool, select a category and select a brushstroke to work with.

Starting at the bottom of the design, use your artistic media brush to draw a curved line up along the side of the car and gear elements.
Select your Pick tool and double-click on your brushstroke. Now select the Shape tool and drag to lasso around the inner nodes of your brushstroke (do not include the first and last nodes at the top and bottom of your brushstroke).
Press Delete on your keyboard to delete the inner nodes you have selected, and this will smooth out the curve of your artistic media design.
Once you are happy with your artistic media design, click Finish Editing Symmetry and then Break Symmetry Link.
To place your artistic media graphic, right-click on it and go to Order > In Front Of and click on the grey halftone background element.
Now that you are familiar with the Symmetry Drawing mode, you can see that this feature will help to speed up your workflow when creating symmetrical designs. Give it a try today!
Start your FREE 15-day trial and embark on a design journey with powerful tools for vector illustration, layout, photo editing, typography, and collaboration.
