Even if you’ve hired a professional photographer for your wedding or other special event, some of your favorite photo memories might be candid moments captured by your guests. But often these spontaneous shots could use a little photo-editing help. It could be anything – the photo is a bit crooked or not perfectly composed, the lighting is under or overexposed, or the colors aren’t as vivid as you remember. This tutorial will give you 7 tips to fix these common problems in PaintShop Pro and enhance your wedding photos.
Thanks for watching! We hope you found this tutorial helpful. You will find a written version of this tutorial below, and a printable PDF copy to download on the Download Resources tab above.
Download your FREE 30-day trial and make every shot your best shot with PaintShop Pro, your all-in-one photo editing and design software.
Download these free resources:
Written Tutorial (PDF, 2 MB)
PaintShop Pro resources
Keyboard shortcuts (PDF, 173 KB)
PaintShop Pro User Guides
Partner and User websites
PaintShop Pro User Forum
Scrapbook Campus (Tips and tricks, workshops, master classes, and more)
Creation Cassel (Scripts, picture tubes, and other PaintShop Pro tools, plus weekly freebies)
PaintShop Pro Maniacs (Facebook group)
PaintShop Pro (Facebook group)
What’s new in PaintShop Pro
Holiday projects
Photo corrections and enhancements
Featured products
 PaintShop Pro 2023 Ultimate
 AI HDR Studio 3.0
 PaintShop Pro 2023
 Vision FX 2.0
7 Tips to enhance wedding photos
This tutorial presents several tips that will help enhance your wedding photos and transform those ordinary snapshots into professional-looking photos.
Tip 1: Straighten your photos
Even the most beautifully staged photo will look very amateurish if it’s crooked. Fortunately, this is an easy fix in PaintShop Pro. Activate the Straighten tool, which places a horizontal straightening bar across the middle of the photo. Drag the endpoints of this bar so that it follows the horizon or follows a line that should be vertical.

If Crop image is checked on the property bar, the extra bits around the edge of the photo will be trimmed away. Click the Apply icon to get a nice, horizontally-oriented image.
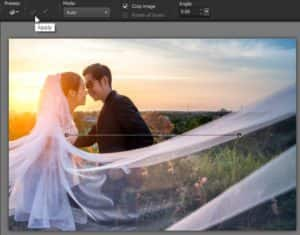
To learn more, watch the full tutorial How to straighten a photo.
Tip 2: Crop and resize
Maybe you want to print a photo at a standard size, or upload it to a social media site, or just trim out some of the background. Once you activate the Crop tool, the floating crop toolbar will appear on your image. On the Presets dropdown list there are a variety of standard ratios, as well as Free form, Original Proportions (if you want to keep the current ratio), or Square presets.

Choose your size, then drag and size the crop rectangle over the part of the photo that you want to keep. With the grid lines that divide the preview into 9 rectangles, you can easily apply the Rule of Thirds, in this example positioning the bride at the top left intersection point. There are several other composition guides on the dropdown list that you can use as well.
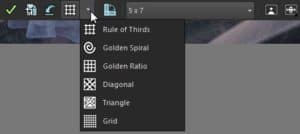
Click Crop as New Image if you want to preserve the original image, or click Apply to crop the original image.

To learn more, watch our full tutorial Cropping photos for better composition.
If your image needs to be printed, you can also size it exactly. Choose Image > Resize, choose the By Print Size option, choose your size, and click OK.
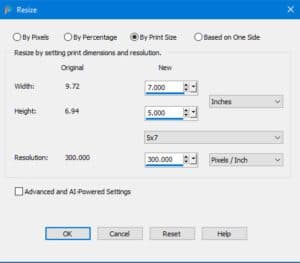
Tip 3: Remove blemishes
PaintShop Pro has some easy-to-use tools that you can use for removing imperfections in your photos. In the Makeover toolset you’ll find the Blemish Fixer tool.
- Activate the Makeover tool.
- Select the Blemish Fixer mode on the property bar.
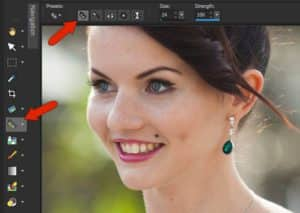
- Zoom in to the area on your photo that you want to fix.
- Adjust the size of the Blemish Fixer so that the inner circle just covers the blemish. You can do this by entering a new value in the Size field on the property bar, or by holding down the ALT key while dragging your mouse up or down.
- Click on the blemish and the tool will fill the inner circle with the pixels from the surrounding area.
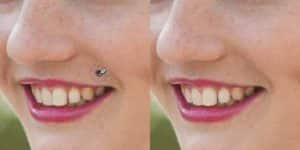
TIP: This tool isn’t just for faces. It can also to remove dust spots, small scratches, and other imperfections.
To learn more about the Blemish Fixer and other makeover tools, watch the full tutorial Using the Makeover tools.
Tip 4: Remove unwanted objects
In this photo, the buildings in the background distract from this otherwise idyllic setting. We can remove them easily with the Magic Fill tool.

In this example, we’ll remove the buildings one at a time.
- Activate the Selection tool.
- Click and drag to draw a selection marquee around the first building.
- Click on the Magic Fill icon on the property bar.

TIP: If there are still some unwanted pixels where an object was removed, try clicking the Magic Fill icon a second time and it will resample. You can also remove the original selection marquee (Ctrl + D to deselect) and then redraw a smaller selection marquee around the leftover bits you want to remove, then click on Magic Fill again.
We’ll repeat the process with the second building.

If the object you want to remove has an irregular shape, you can use the Freehand Selection tool to trace around the area, then click Magic Fill.
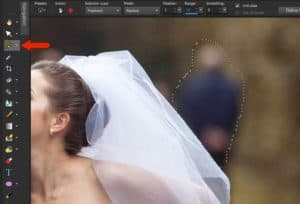
The Magic Fill tool is just one way to remove unwanted objects from your photos. Check out these full tutorials to learn about other tools and techniques you can explore.
Removing unwanted objects from photos
Using the Clone brush and Advanced cloning techniques
Tip 5: Adjust lighting
Poor lighting is a common issue in candid photos. PaintShop Pro has many tools that can be used to fix under- or overexposed photos. You may need to experiment with the different adjustment tools listed below, or use a combination of adjustments if your photo has areas that are too light as well as areas that are too dark.
Often, only small adjustments are needed to greatly improve a photo – don’t go overboard when adjusting lighting! All the tools listed below can be found under the Adjust menu.
Fill Flash
Outdoor nighttime photos can come out too dark if flashes aren’t used properly.
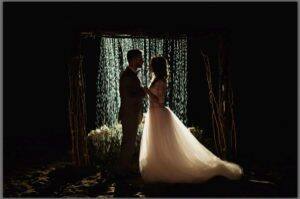
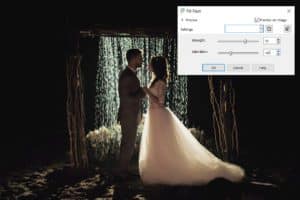
Try Adjust > Fill Flash. With Preview on Image checked, you can see what happens in real time as you adjust the sliders. In this particular photo, increasing the Strength setting and reducing the Saturation setting can bring out more detail while still retaining the nighttime atmosphere.
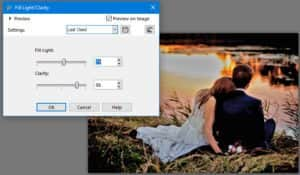
Fill Light and Clarity
Another brightening tool is Adjust > Brightness and Contrast > Fill Light and Clarity. Increasing the Fill Light setting makes an image brighter, and you can sharpen lines by increasing the Clarity setting.
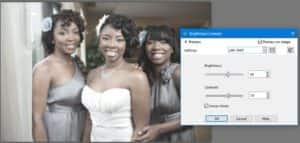
Brightness/Contrast
For images that need more general brightening, try Adjust > Brightness and Contrast > Brightness/ Contrast. Adjust the sliders to find the right balance between brightness and contrast for your photo.
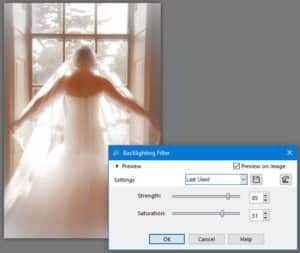
Backlighting
When a daytime indoor photo is set by a window, the window light can overwhelm the subject. Try Adjust > Backlighting and nudge up the Strength and Saturation settings.
Tip 6: Adjust color
If the colors in your photos not as bright and vivid as you would like, PaintShop Pro’s Adjust menu has some tools you can use. But keep in mind, as with lighting adjustments, a little goes a long way and if you overdo it with color settings, your photos could end up looking garish and oversaturated.
This washed-out photo could be a bit more vibrant:

The solution here is to try Adjust > Hue and Saturation > Hue/Saturation/Lightness. If we increase both the Lightness and the Saturation settings, it will bring out the colors in the flowers and the food.

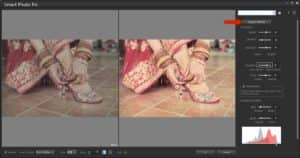
When you want to improve a photo but you’re not quite sure how, a great place to start is with Adjust > Smart Photo Fix. Clicking the Suggest Settings button will give you a place to start – you can use what is suggested or make some additional adjustments yourself, all while comparing against the original image. In this example, we increased overall brightness, highlights, and saturation.
Tip 7: Add effects
Once you have taken care of straightening, cropping, removing unwanted objects, and adjusting lighting and color, PaintShop Pro has hundreds of effects that you can explore and use to enhance your photos further.
In addition to some very creative results, many of these effects can also help disguise any issues or imperfections that you weren’t able to fix completely – consider a black and white or sepia effect on a photo where you weren’t able to get the color or lighting just right, or an art style effect on a low-quality photo that’s a bit grainy or blurry.
One popular effect is Depth of Field, in which you can emphasize a particular object or subject while de-emphasizing what’s around it.
- Go to Adjust > Depth of Field.
- Choose a selection tool to define the area of focus.
- Adjust the Blur setting to control the amount of background blur.
- Adjust the Feather Edge setting to adjust the transition between area of focus and blurred area.

To learn more, watch the full tutorial Creating a Depth of Field effect.
The Effects menu is also a great place to explore. Effects > Photo Effects > Sepia Toning provides a retro look:
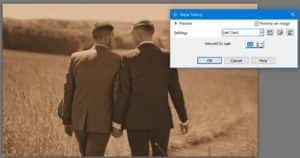
And in Effects > Art Media Effects there are several options to choose from, such as this Black Pencil effect which adds a hand-drawn look.

For some easy ways to enhance wedding photos, take some time to poke around the Instant Effects palette, which you can open in the Palettes menu or by pressing Shift + F2. There are several categories, such as Film Styles. Click an effect to see the preview, and double-click the effect to apply it.
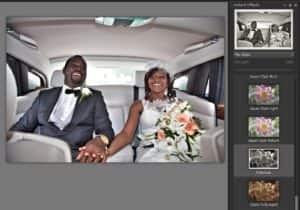
To learn more, watch our full tutorial Adding Instant Effects.
Instant Effects are scripts, which are a series of effects and adjustments set to run automatically all at once. Many more scripts can be found in the Welcome Book. You can open the welcome book by clicking the Home icon at the top of the PaintShop Pro interface. Once open, click on the Get More or Store option on the left side to see the scripts and other products for sale. You can use the filters on the right to narrow down the catalog of products to see only scripts.

Download your FREE 30-day trial and make every shot your best shot with PaintShop Pro, your all-in-one photo editing and design software.

