Start your FREE 15-day trial and embark on a design journey with powerful tools for vector illustration, layout, photo editing, typography, and collaboration.
What’s New in CorelDRAW Graphics Suite
Introduction to PHOTO-PAINT
PHOTO-PAINT Projects
The Vibrance, Grayscale and Photo Filter Effects in Corel PHOTO-PAINT
This tutorial shows you how to use three powerful photo effects in Corel PHOTO-PAINT to improve your images. The Vibrance effect is great for balancing color saturation. It adds richness to colors with low saturation while maintaining colors with high saturation. The Grayscale effect is ideal for removing the saturation of an object, layer or region of a photo. It also lets you choose the colors used in the grayscale conversion. The Photo Filter effect lets you simulate the result of having a camera lens filter installed when a picture was taken. We will also take a look at the Tone curve and how it can be used to enhance you photos. With these tools, the novice photographer can look like a professional!
Vibrance

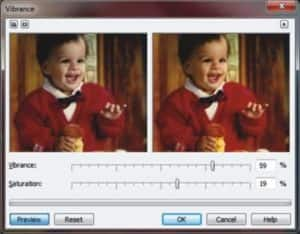
The Vibrance filter allows you to increase the saturation in an RGB image without causing clipping or blowing out the image. Clipping occurs when an area of an image is too bright and the color details in the area are lost, which can occur when you increase the saturation in an image indiscriminately. The Vibrance filter adjusts saturation proportionally by increasing the saturation of the less-saturated colors more than that of the saturated colors. This filter is useful for adjusting the saturation of images that include a person in front of a detailed background. For example, it allows you to boost the saturation of the background details without adversely affecting the skin tone of the person in the image.
From the Adjust menu, select Vibrance. There are two sliders, one for Vibrance and another for Saturation. It is simply a matter of moving these sliders until you obtain a result that you are pleased with.
Grayscale
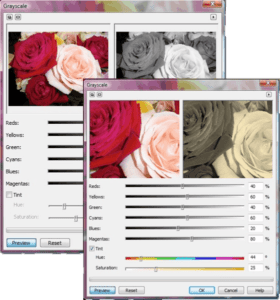
The Grayscale filter lets you produce a black and white image without changing the color mode. It also allows you to adjust individual colors for conversion, which modifies the intensity of the gray tones in the image when its converted. In addition, you can tint the image by modifying the hue and saturation. For example, you can add a tint to an image to produce a Sepia effect.

The Grayscale adjustment dialog box is a bit more involved than the Vibrance adjustment, however it is just as easy. Now, one point that I should make here is that using this feature to create a grayscale image, is not the same as going to Image > Convert to Grayscale. The Image > Convert to Grayscale creates an 8-bit image where Grayscale adjustment only works on 24-bit RGB images and after it is applied, the image is still 24-bit RGB.
From the Adjust menu, select Grayscale. You will be presented with a dialog box that allows you to preview a Before and After image. There are six sliders that adjust for the different color channels, RGB & CMY. If you choose to, you can also apply a tint to the image by selecting the Tint checkbox. This then gives you the further ability to adjust the Hue and Saturation slider.
Photo Filter
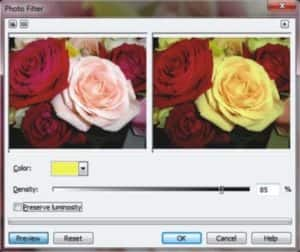
The Camera special effects let you simulate the effect produced by photographic filters, such as spot filters and diffusion filters. You can also add lighting effects, such as sun flares or spot lights. The Photo filter lets you simulate the effect of placing a colored filter in front of a camera lens. You can choose the color of the filter and then adjust the color density you also have the option to preserve luminosity.

Tone Curve
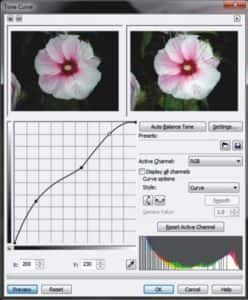
The Tone curve filter lets you perform color and tonal corrections by adjusting either individual color channels or the composite channel (all channels combined). Individual pixel values are plotted along a tone curve that appears in a graph and represents the balance between shadows (bottom of graph), midtones (middle of graph), and highlights (top of graph). The x-axis of the graph represents the tonal values of the original image; the y-axis of the graph represents the adjusted tonal values.

The tone curve shows the balance between the shadows, midtones, and highlights of an image. The original (x) and adjusted (y) pixel values are displayed side by side when you drag the tone curve.
You can fix problem areas by adding nodes to the tone curve and dragging the curve. If you want to adjust specific areas in an image, you can use the Eyedropper tool and select the areas in the image window. You can then drag the nodes that appear on the tone curve to achieve the effect you want.
The histogram lets you view the adjusted tonal range and evaluate the results. For more information about histograms, see “Using histograms” in the Online help of Corel PHOTO-PAINT.
To fine-tune your adjustments, you can choose a curve style from the Style list box. For example, you can redraw the curve by using freehand lines or straight line segments.
You can adjust the color and tone of an image by applying a preset. To access a preset, click the Open button to the right of the Presets box. You can also save tone settings as presets to use with other images.
Whether you are a professional photographer looking to enhance your images, or an amateur looking for professional results, these effects are sure to make your images stand out. Take a few moments to play around with them and see just how easy and effective they can be.
 CorelDRAW Graphics Suite
 Ultimate Vector Bundle Vol. 1
 CorelDRAW Standard 2021
 Ultimate Vector Bundle Vol. 2
 Corel Vector
Start your FREE 15-day trial and embark on a design journey with powerful tools for vector illustration, layout, photo editing, typography, and collaboration.

