Start your FREE 15-day trial and embark on a design journey with powerful tools for vector illustration, layout, photo editing, typography, and collaboration.
What’s New in CorelDRAW Graphics Suite
PHOTO-PAINT Projects
Introduction to PHOTO-PAINT
For digital artists and graphic designers, being able to adjust and correct images quickly and easily is critical. In this article, we’ll look at several quick methods of punching up your images in Corel PHOTO-PAINT in a few, easy-to-apply steps.
This tutorial was created in CorelDRAW Graphics Suite X7. While some features might be available in previous releases, the tutorial will be fully applicable to CorelDRAW Graphics Suite X7 and higher only.
For digital artists and graphic designers, being able to adjust and correct images quickly and easily is critical. In this article, we’ll look at several quick methods of punching up your images in PHOTO-PAINT in a few easy steps.
We’ll also look at which file formats are the best for use on the Web and for work with service bureaus.
Determining What Resolution to Use
The destination of your images determines the resolution for your finished product. You can use the following table to determine what resolution you should use:
| Output | Resolution* |
| Web | 72 dots per inch (dpi) |
| Newspaper | 125 dpi to 170 dpi |
| High-quality brochures and magazines | 200 dpi to 400 dpi |
| Book layouts | 175 dpi to 350 dpi |
Scanning Images for PHOTO-PAINT
There are a couple of important things to consider when scanning: the quality of your print or film scanner, and the quality of the image being scanned. The higher the quality of both your scanner and the original image, the better the image that you work with in PHOTO-PAINT.
A high-quality original yields the best results, whether it’s print or film. Here are some things to look for:
- Good color saturation
- Edge-to-edge sharpness
- Smooth color graduation (no banding)
- Smooth contrast definition from highlights to shadows, where highlights retain some detail and aren’t blown out, and shadows contain detail and don’t suddenly fall to solid black.
It’s a good idea to scan a document at a higher resolution than the one you need. For example, if you’re scanning an image for the web, scan at 150 dpi instead of 72 dpi. Once the image is scanned, reduce the image to the size you need.
Fixing Moiré Patterns
When scanning, sometimes you’ll encounter moiré patterns, rainbow-colored streaks which are caused by a misalignment between the pixels and the scanning device or camera. Sometimes moiré patterns are the result of an original image that has tightly knit, multicolored areas or a tightly repeating pattern, such as a hound’s tooth design in fabrics.
In my experience, moiré patterns often occur when scanning images from a magazine. In the process of printing the magazine, dots are overlaid to create the color image that you see. In some cases, scanning such an image creates a moiré pattern.
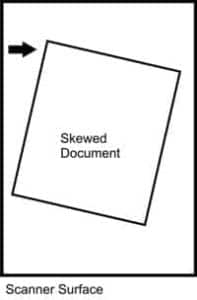
You can often reduce moiré patterns by skewing the document while scanning it. With the document flat on the scanner surface, rotate it at an angle from the vertical, and then scan it. After the scan comes up in PHOTO-PAINT, you can rotate the image back to the vertical by clicking Image > Rotate and choosing a rotation option.
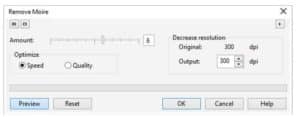
You can also quickly and easily remove moiré patterns in PHOTO-PAINT by clicking Effects > Noise > Remove Moiré.
Correcting Exposure Problems Quickly
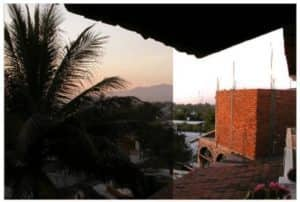
PHOTO-PAINT lets you quickly correct exposure problems, which are caused by too much light (overexposure) or not enough light (underexposure) at the time the photo was taken. Here are a couple of quick techniques that you can use.
Using the Image Adjustment Lab
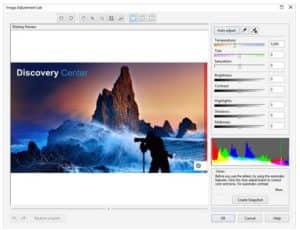
The Image Adjustment Lab consists of automatic and manual controls, which are organized in a logical order for image correction. You can access the Image Adjustment Lab by clicking Adjust > Image Adjustment Lab. For a quick fix, click Auto-Adjust in the upper-right corner, and then click OK. In many cases that will be enough to correct any exposure problems.
Adjusting Exposure in the Object Manager Docker
You can also adjust exposure in the Object Manager docker, which you can open by clicking Object > Object Manager. In the docker, drag the background object down onto the New Object button at the bottom of the docker to make a copy of the background.
Then, choose either Add or Multiply from the Merge Mode list box at the top of the docker. The Add mode increases the exposure (often quite dramatically), while the Multiply mode decreases the exposure. You may need to make several copies of the background to obtain the exposure you want. You can reduce the effect by adjusting the opacity of an object with the Opacity slider.
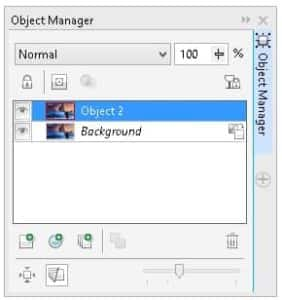


When you’re satisfied with the exposure, you can merge all objects into one by clicking Objects > Select All Objects and then clicking the Combine Selected Objects button at the bottom of the Object Manager docker.
Choosing Output File Formats
Two common image-output destinations are the web and service bureaus. The file format for your final image is determined by where it is going to be viewed.
For the web, I recommend using the JPEG format for most images. For 8-bit images, I recommend using the GIF or PNG format. Depending on the image, the compression may be slightly more or less in a PNG file than in a GIF file. Check out this article to learn more about image optimization for the web.
When you’re working with a service bureau, TIFF is the universally preferred file format. You can also use PHOTO-PAINT to create a PDF, which produces excellent results.
Exporting to PDF from PHOTO-PAINT and CorelDRAW
When I created my book cover, I used PHOTO-PAINT to do some color correction on my photographs, which I then imported into CorelDRAW. Once I completed my layout, I saved it as a TIFF, which merged my photos into the background and gave me a solid black. From there, I imported the image into PHOTO-PAINT and used the Publish to PDF command to create the image you see below.
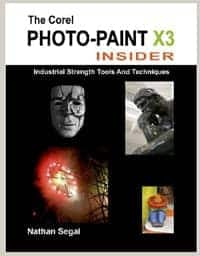
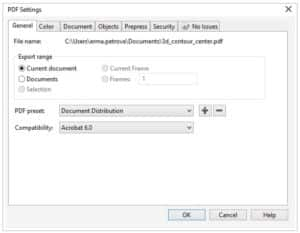
To export your file to PDF, click File > Publish to PDF. You can access a wide variety of options by clicking Settings in the Publish to PDF dialog box, which opens the PDF Settings dialog box. For example, you can add crop or registration marks, set JPEG compression, and add a password to the file.
For layouts created solely in CorelDRAW, you can make things easier for the printer by clicking File > Collect For Output in CorelDRAW. This launches a wizard that lets you gather all the files in the layout (such as fonts), create a PDF, and store all the files in one folder, making it easy to send the files to a service bureau. I recommend sending the PDF, all the fonts, and the original CDR file. To make things even simpler, use WinZip to group and compress all your files together before sending them.
In this tutorial, you’ve learned some important design and image manipulation techniques, such as how to set up your layouts, create high-quality scans, make quick exposure corrections, and work with service bureaus. Applying this knowledge will speed up your workflow and make it easier to obtain the results that you seek.
 CorelDRAW Graphics Suite
 Ultimate Vector Bundle Vol. 1
 CorelDRAW Standard 2021
 Ultimate Vector Bundle Vol. 2
 Corel Vector
Start your FREE 15-day trial and embark on a design journey with powerful tools for vector illustration, layout, photo editing, typography, and collaboration.

