If you can’t find just the right Instagram template, why not make your own custom template in CorelDRAW? CorelDRAW has tons of tools and effects you can use to design professional-looking custom templates. In this tutorial, we’ll show you all the steps including how to create the background, adding a photo and frame, decorative elements, and text. Although our project is holiday-themed, you can use these tools and effects to create templates for any occasion.
Thanks for watching! You will find a written version of this tutorial below, and a printable PDF copy to download on the Download resources tab above.
Start your FREE 15-day trial and embark on a design journey with powerful tools for vector illustration, layout, photo editing, typography, and collaboration.
Download these free resources:
Written tutorial (PDF, 1 MB)
VectorStock design elements (Zip file, 8.7 MB) This file was provided by VectorStock / Voysla
CorelDRAW Graphics Suite resources
Quick Start Guide (PDF, 2 MB)
Keyboard Shortcuts (PDF, 3.5 MB)
CorelDRAW and Corel PHOTO-PAINT user guides
For CorelDRAW Graphics Suite subscription and perpetual licenses (2018 to 2024), languages include English, Português do brasil, 简体中文, 繁體中文, Čeština, Deutsch, Español, Français, Italiano, 日本語, Polski, Русский
CorelDRAW Community
CorelDRAW learning center
Facebook
X (formerly Twitter)
YouTube
What’s new in CorelDRAW Graphics Suite
Templates, clipart, and symbols
Social media and web graphics
 CorelDRAW Graphics Suite
 Ultimate Vector Bundle Vol. 1
 CorelDRAW Standard 2021
 Ultimate Vector Bundle Vol. 2
 Corel Vector
Make an Instagram template in CorelDRAW
In this tutorial, you’ll learn how to make a custom Instagram template in CorelDRAW. I’ll show you how to create a background, add design elements, custom photo openings, add text, and more! Although our example is holiday-themed, you can use this design process for any kind of template.
To learn more about the tools used in this project:
Rectangle Tool
Common Shapes Tool
PowerClip
Shadow Tool
Contour Tool
Working with Text
How to set up your document
Open up CorelDRAW and then go to File > New to create a new document. In the Create a New Document window, you can manually change the Resolution to 96 dpi and the Primary color mode to RGB, or you can open the Preset dropdown list and choose Web, which will automatically change these settings for you. Set the Width and Height to 1080 x 1080 pixels, which is currently the default square size for an Instagram post.
If you want to save these settings as a preset to use in future projects, click the three dots beside the Preset dropdown box.
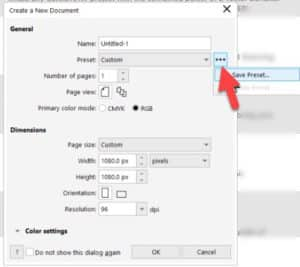
Click Save Preset and name your preset. Press OK. Now when you go to create a new CorelDRAW document, you can access your saved presets from the list.
Adding a background
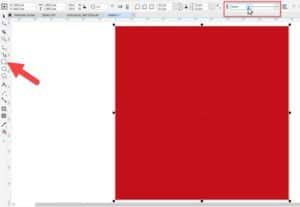
- Double-click on the Rectangle tool in the Toolbox to create a rectangle the size of the page.
- Click on a color swatch in the Color palette to fill the background.
- If you want to remove the outline, either right-click on the no-color swatch at the top of the Color palette or set the Outline width to None on the property bar.
- If you want to keep the outline, you can adjust the Outline width and Line style on the property bar as you wish, and click a color swatch to change the color.
Adding a photo frame
Our Instagram template is going to have 2 different shape frames for the photos. You can choose to create any number of frames in whatever shapes you prefer.
Our first shape is a square. To create it, activate the Rectangle tool and draw the shape on the template. If necessary, you can use the Pick tool to resize, reposition, and/or rotate the shape.
Our second shape is a heart. To create it, activate the Common Shapes tool, select the Heart from the Common Shapes dropdown on the property bar. Draw the heart on the template, and use the Pick tool to resize, reposition, and/or rotate if necessary.
To learn more about the Common Shapes tool, watch the full tutorial How to Use the Star, Spiral, and Common Shapes Tools.
To make these shapes into photo frames, we’re going to use the PowerClip tool.
- Select the shape with the Pick tool
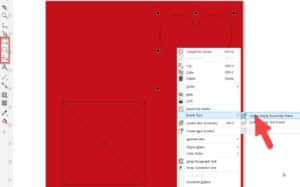
- Under the Object menu choose PowerClip > Create Empty PowerClip Frame.
- Alternatively, you can also right-click the shape, choose Frame Type, and click Create Empty PowerClip Frame.
Once you have created the PowerClip frames, it’s time to add the photos.
- Click the Import icon, browse and select your photos, and click Import.
- Click and drag to insert the images into the drawing window, beside the template.
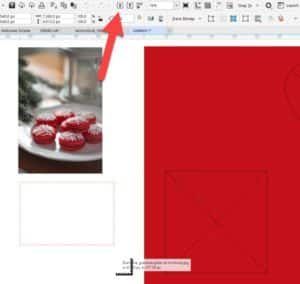
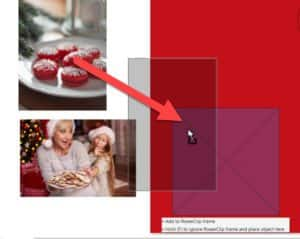
- Select one of the photos and drag it over to the PowerClip When the object approaches the frame, the frame is highlighted.
- Simply release the mouse button to add the object to the empty frame.
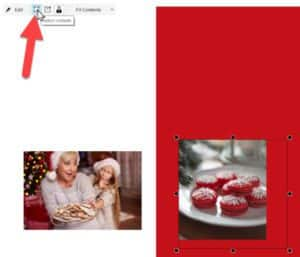
- Click the Select Contents icon on the PowerClip menu bar and you can position the image where you want it within the frame and drag on any of the nodes to resize the image.
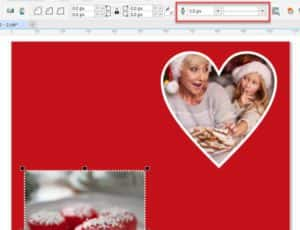
- Adjust or remove the border around the photo frames using the Outline settings on the property bar.
- You can change the color of the border, increase the width, and even change the line style.
To learn more about PowerClip, watch the full tutorial How to Use PowerClip.
How to add design elements
Open the file containing the design elements you want to use. In this case, we are using a free VectorStock file in CDR format that is available to download on the Download Resources tab at the top of the tutorial page. If you are looking for more vector content, visit the Store (or Get More in previous versions) on the CorelDRAW Welcome Screen.
- Use the Pick tool to select any of the vector objects in the document.
- If you want to select multiple objects, hold down the Shift key as you select them one by one.
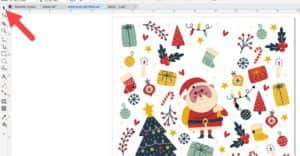
- Then go to Edit > Copy (or use Ctrl + C), switch to your template and go to Edit > Paste (or Ctrl + V) to paste into your template.
- Use the Pick tool to adjust the size and positioning of the vector objects.
How to add shadows and 3D effects
To add a drop shadow to some of the elements:
- Select the object.
- Activate the Drop Shadow tool, which you will find on the Toolbox in the Effects tool group flyout.
- Click inside the object and drag outward to place the drop shadow.
- Adjust the opacity of the drop shadow by moving the slider and drag the end handle to change the direction of the drop shadow.
To learn more about the Shadow tool, watch the full tutorial Adding Depth with Shadows.

To add some 3D effects to make these elements stand out, click on the object.
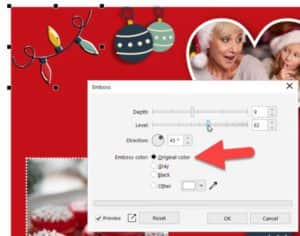
- Then go to Effects > 3D Effects > Emboss.
- Select the Original color for the Emboss color and adjust the Depth and Level settings so the lights pop out more and press OK.
Using the Artistic Media tools
Another effect we will add is to create some “snow” in the corners of the template.
- Activate the Artistic Media tool which can also be found in the Toolbox.
- On the property bar, click the Preset button and then select white from the Color palette.
- Draw out a bed of snow along the borders.
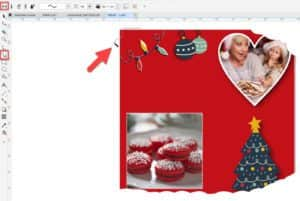
If your “snow” has ended up on top of other objects and you want it to be underneath them, you can adjust the order by dragging them up or down in the Objects docker (Window > Dockers > Objects). Alternatively, select the snow object and go to Object > Order > In Front of. The cursor will change to an arrow, and if you click on the background, this will place the snow above the background but below the photos and decorative elements.
How to add text
- Click on the Text tool from the Toolbox and then click on your image and type out your desired text.
- Use the settings on the property bar to change the font, and adjust the size and other formatting options.
- Click on a color in the Color palette to change the text color.

To learn more about the Text tool, explore the tutorial series Working with Text in CorelDRAW.
If you want to make your text stand out, you can add an outline to the text with the Contour tool. The Contour tool can be found in the same Effects tool group flyout as the Shadow tool we used previously. Activate the tool and then click and drag on the text to draw out a border around the text.
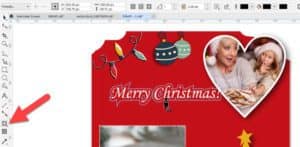
To learn more, watch the full tutorial How to Use the Contour Tool.
How to export
Once you’re happy with your template design, it is time to save and export. First, you may want to use the Crop tool to crop the document to 1080x1080px again if you have any objects on the document that surpass the bounding box (such as the snow objects).
TIP: this is easy to see if you view the document in wireframe by going to View > Wireframe.
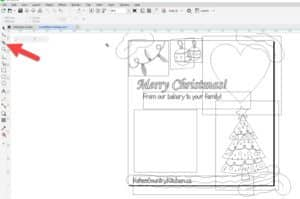
Make sure you have saved the template in CDR format to preserve the layers, objects, and effects in case you want to make any edits later. To export the finished design, go to File > Export for > Web and choose one of the PNG or JPG presets to export as.
NOTE: When you’re dealing with bitmaps destined for the web, the resolution should be no more than 96 DPI to reduce file size.

These are a few of the many ways you can have fun designing and creating your own holiday projects in CorelDRAW! Create your own Instagram template and share it in our Graphic Design User Gallery.
Start your FREE 15-day trial and embark on a design journey with powerful tools for vector illustration, layout, photo editing, typography, and collaboration.


Comments (3)
Reader Interactions
Comments
Sadly, the written tutorial is not the same as the video…
Does anyone know where it is?
Hi Erica,
Thanks for letting us know and sorry about that! The link has been updated with the correct written tutorial.
Best regards,
The Discovery Center team
coreldral always crashing