
With CorelDRAW’s Shadow tool, you can add 3D depth to your text and design elements and simulate light falling on objects. In this tutorial, you will learn how to use the Inner Shadow tool introduced in CorelDRAW 2020, as well as the Drop Shadow tool. See how easy it is to apply shadows with just a click, and then fine-tune with the property bar controls for color, width, transparency, direction, feathering, and more, until you get just the right look.
Thanks for watching! You will find a written version of this tutorial below, and a printable PDF copy to download on the Download resources tab above.
With CorelDRAW’s Shadow tool, you can add 3D depth to your text and design elements and simulate light falling on objects. In this tutorial, you will learn how to use the Inner Shadow tool introduced in CorelDRAW 2020, as well as the Drop Shadow tool. See how easy it is to apply shadows with just a click, and then fine-tune with the property bar controls for color, width, transparency, direction, feathering, and more, until you get just the right look.
Thanks for watching! We hope you found this tutorial helpful. You will find a written version of this tutorial below, and a printable PDF copy to download on the Download Resources tab above.
Start your FREE 15-day trial and embark on a design journey with powerful tools for vector illustration, layout, photo editing, typography, and collaboration.
Download these free resources:
Written tutorial for Windows (PDF, 642 KB)
Written tutorial for Mac (PDF, 633 KB)
CorelDRAW Graphics Suite resources
Quick Start Guide (PDF, 2 MB)
Keyboard Shortcuts (PDF, 3.5 MB)
CorelDRAW and Corel PHOTO-PAINT user guides
For CorelDRAW Graphics Suite subscription and perpetual licenses (2018 to 2024), languages include English, Português do brasil, 简体中文, 繁體中文, Čeština, Deutsch, Español, Français, Italiano, 日本語, Polski, Русский
CorelDRAW Community
CorelDRAW learning center
Facebook
X (formerly Twitter)
YouTube
What’s new in CorelDRAW Graphics Suite
CorelDRAW tools
Adding effects
 CorelDRAW Graphics Suite
 Ultimate Vector Bundle Vol. 1
 CorelDRAW Standard 2021
 Ultimate Vector Bundle Vol. 2
 Corel Vector
Adding depth to your designs with the Shadow tools
We’ll start with a simple document to illustrate the two types of shadows that you can create with the Shadow tool: drop shadows and inner shadows.
Click on any of the images below to view full-size.

The Shadow tool can be found on the left toolbar.
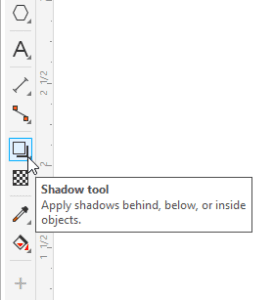
Once you activate it, the tool’s options will be available on the Property Bar.
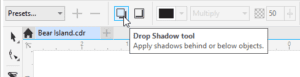
How to apply a Drop Shadow
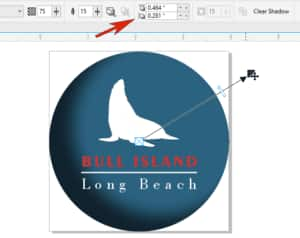
Select the Drop Shadow tool on the property bar. Click in the center of the object you want to apply the shadow to (in this case, the blue circle) and drag outside the object in the direction that you want the shadow to fall. This shadow effect makes the entire circle appear to be floating above the white background.

If you want to apply a uniform drop shadow instead of an angled drop shadow, keep the end arrow of the Drop Shadow tool within the object (circle).

To remove the drop shadow, click on the Clear Shadow button on the property bar.

How to apply an Inner Shadow
Introduced in CorelDRAW 2020, the Shadow tool now includes an inner shadow option. Click on the Inner Shadow button on the property bar.
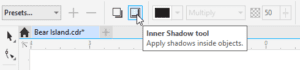
Drag from the center outward, and the shadow now is all inside the circle. The depth effect appears along the edges, giving the circle itself a 3D appearance.

You can drag the bar along the arrow to change the shadow opacity.

Editing shadows
The property bar offers several settings that can be adjusted to edit a drop or inner shadow:
- Shadow color— to choose the shadow color.
- Merge mode— to choose how the color of the shadow blends with the color of the underlying object. The default merge mode Multiply produces natural-looking shadows.
- Shadow opacity— to adjust the transparency of the shadow.
- Shadow feathering— to sharpen or soften the edges of the shadow.
- Feathering direction— to soften the shadow’s edges towards the inside of the shadow, the outside of the shadow, or in both directions.
- Feather edge— to choose a feathering type.
- Inner shadow width— to set the width of an inner shadow that is not offset.
- Shadow offset— to change the distance between shadow and the object edge.
You can also use the Shadow tool controls to adjust the shadow. For example, dragging the arrow outside the circle produces a side-lit effect, and changing the arrow direction changes the Shadow Offset values.
Adding depth with shadows
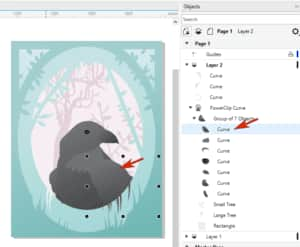
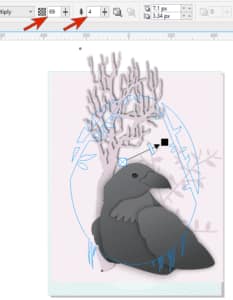
For a more complex example, we’ll add shadows to give depth effects to the various layers of this bird image. Make sure you have the Objects docker open (Window > Dockers > Objects).

We’ll start with the bird itself. Notice how the wing blends with the object above it, with no definition between the two objects. Click on the wing in the Objects docker to select it.
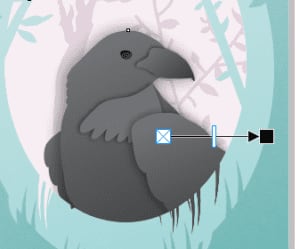
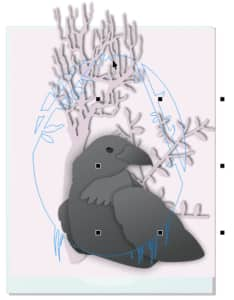
Now apply a drop shadow from the center and you will see how the shadow makes the wing appear to be raised above its neighbors.
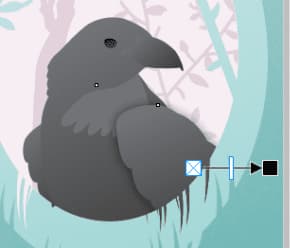
You can also apply a drop shadow on the neck, beak and body.
To give the trees some depth, we’ll apply more drop shadows. Like the curves of the bird, both trees are inside a PowerClip. You could pre-select the tree in the Objects docker like we did with the bird curves, but let’s use a different method. Right-click on the tree and choose Edit PowerClip.
With the Drop Shadow tool still active, you can access the tree and click and drag to create the drop shadow.
On the property bar, you can increase the shadow opacity and decrease feathering. On the tree, you can drag the arrow to adjust the angle.
How to copy a shadow onto another object
With the Drop Shadow tool still active, you can apply the same shadow to the small tree. Select the curve of the small tree in the Objects docker, then click Copy Shadow Properties on the property bar.

Click anywhere on the shadow of the large tree, and the same shadow is applied to the small tree.
Right-click in a blank space on the page and choose Finish Editing PowerClip.
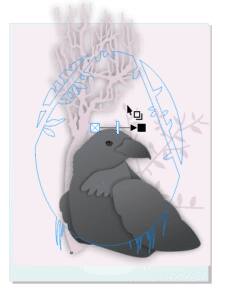
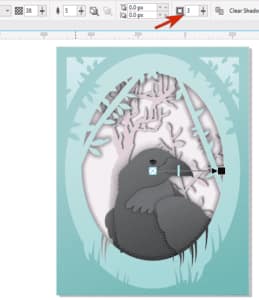
Now we want to apply inner shadows on the curves that make up the frame of the image. Start by selecting the PowerClip curve in the Objects docker, then activating the Inner Shadow tool. Click anywhere in the center, drag, and stop within the curve.
You can reduce the inner shadow width, as well as the feathering. Note that this curve is a lot more complex than the circle we used in the beginning, but the inner shadow still follows all edges.
To apply an inner shadow to the outer green oval, you can copy the inner shadow that was applied to the inner green oval in the previous step. With the Inner Shadow tool still active, select the outer green oval in the Objects docker, then click on the Copy Shadow Properties button on the property bar. Click on the shadow of the inner green oval, and it will be copied to the outer green oval.
How to apply a shadow to multiple objects or groups
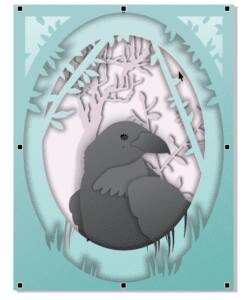
For the two remaining curves in the top corners, you could easily select each and copy the previous shadows. But you can also group them to apply the shadow to both at the same time.
Select the first corner curve in the Objects docker, hold down the Shift key and select the second corner curve in the Objects docker. On the property bar, click on the Group icon.
Now you can apply an inner shadow, either by copying the inner shadows applied to one of the green ovals, or by clicking and dragging to apply a new shadow and adjusting with the controls on the property bar.

Applying shadows to text
Shadows can be applied to text as well. In this example, an inner shadow is applied to the text string. As long as the arrow stays within one of the letters, each letter will have the same inner shadow.

With the Text tool, you can edit the text, or change the font, and the inner shadow is maintained.

To switch from an inner shadow to a drop shadow, select the text and activate the Shadow tool. On the property bar, switch the mode to Drop Shadow and adjust shadow properties as you wish.

Start your FREE 15-day trial and embark on a design journey with powerful tools for vector illustration, layout, photo editing, typography, and collaboration.
