
This tutorial covers three CorelDRAW font topics: how to set default font properties, how to substitute missing fonts, and how to embed fonts.
Thanks for watching! We hope you found this tutorial helpful and we would love to hear your feedback in the Comments section below. You will find a written version of this tutorial below, and a printable PDF copy to download on the Download Resources tab above.
Start your FREE 15-day trial and embark on a design journey with powerful tools for vector illustration, layout, photo editing, typography, and collaboration.
Download these free resources:
Written tutorial for Windows (PDF, 442 KB)
Written tutorial for Mac (PDF, 448 KB)
CorelDRAW Graphics Suite resources
Quick Start Guide (PDF, 2 MB)
Keyboard Shortcuts (PDF, 3.5 MB)
CorelDRAW and Corel PHOTO-PAINT user guides
For CorelDRAW Graphics Suite subscription and perpetual licenses (2018 to 2024), languages include English, Português do brasil, 简体中文, 繁體中文, Čeština, Deutsch, Español, Français, Italiano, 日本語, Polski, Русский
CorelDRAW Community
CorelDRAW learning center
Facebook
X (formerly Twitter)
YouTube
Working with Text
What’s New in CorelDRAW Graphics Suite
 CorelDRAW Graphics Suite
 Ultimate Vector Bundle Vol. 1
 CorelDRAW Standard 2021
 Ultimate Vector Bundle Vol. 2
 Corel Vector
Default, Substitute and Embedded Fonts
In this tutorial, we’ll cover default text properties, font substitution, and font embedding in CorelDRAW.
Click on any of the images below to view full-size.
Default Text Properties
There are two ways to change the default font for both artistic and paragraph text. When you activate the Text tool, the default font and size for paragraph text are listed in the Property Bar.

Before adding text, you can change the defaults. Choose the font you want to use as the artistic text default, and in the prompt that appears, choose Artistic Text and click OK.
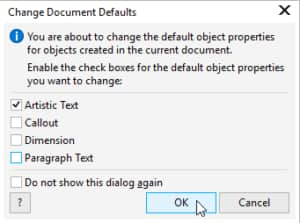
The same prompt will appear when changing the font size, color, or other properties such as font style, underlining, horizontal alignment, etc.
Now when you click to start adding artistic text, the font and size you set appear in the Property Bar, and the default color is used. These properties will be used each time you create artistic text in this document.
Activate the Text tool again and follow the same steps to set the font and size you want to use for paragraph text, choosing Paragraph Text in the prompt. Now these properties will be used each time you add paragraph text in this document.
This will also be the default text if you choose an existing shape as the text frame.

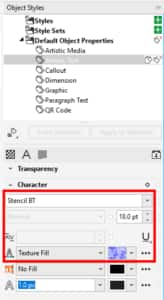
The other way to set default fonts is in the Object Styles docker (Window > Dockers > Objects Styles). Open Default Object Properties, then Artistic Text. Not only can you set a default font, style, and size, but you can set kerning, choose from a variety of fills and background fills, or set an outline. Paragraph and Transparency properties can be set here as well.
Once you have made changes to these settings, add some new artistic text and you will see that it uses the new defaults.

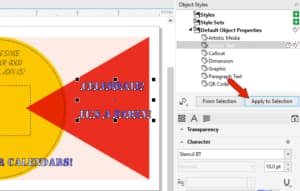
If you want to change existing text to the new default, select the text and click Apply to Selection.
You can use this docker to set defaults for paragraph text as well, along with several other types of objects.
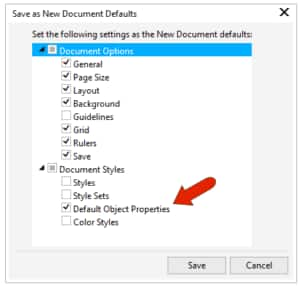
Note that the defaults you set this way only apply to the current document. If you want these to be the defaults for future documents as well, choose Tools > Save Settings as Default. Make sure that Default Objects Properties is checked before clicking Save.
Font Substitution
If you open a document that includes fonts that aren’t installed on your operating system or in CorelDRAW, you’ll see the Substitute Missing Fonts window, listing all fonts found in the document that can’t be used in CorelDRAW. The PANOSE system is used to determine which of your available fonts are the closest to the ones you don’t have.
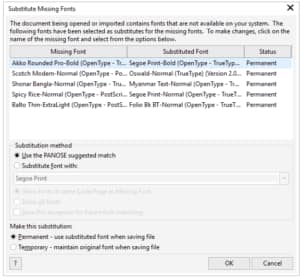
You can also choose which fonts to substitute. When choosing a font, you can choose to limit your choices to those that share the same code page as the missing font. A code page is a set of characters that have ASCII numbers assigned to them, and a shared code page means that characters in both fonts will have the same numbers. Alternatively, you can choose from all fonts in your system. You can also choose to save this exception, meaning substitution, for future font matching.
At the bottom of this window, you can also choose Permanent to use the substituted font when saving the file or choose Temporary to keep the original font when saving.
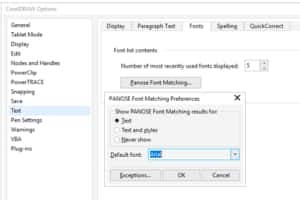
Manual font substitution would have to be done for each missing font. To set application-wide font substitutions, choose Tools > Options > CorelDRAW, then open the Text page to the Fonts tab. Here you can choose where or whether to show PANOSE suggestions, as well as the default substitution font if a closer match can’t be identified.
Click Exceptions to define substitutions you want to use when opening any document. In this example, Courier-Normal is the missing font, and Courier10 WGL4 BT is the font that will be used to substitute.
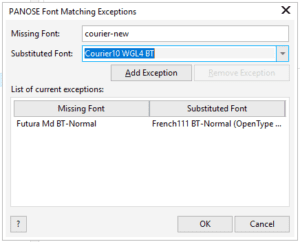
After clicking Add Exception, this substitution will be done automatically when opening a document. You can remove an exception by selecting it and clicking Remove Exception.
Embedding Fonts
When saving a document, you can choose whether to embed the fonts that were used.

Embedding fonts when saving means that all fonts will be included in the document. Depending on the font’s permissions, this may mean that the font will be available to use, even if the document will be opened on a computer that doesn’t have all fonts installed.
NOTE: Because of the extra data included in the file, font embedding will result in a higher file size than a document that doesn’t have automatic font embedding.
When a document’s fonts are not embedded, then opening the document on a computer without the necessary fonts installed will require font substitution.
When embedding a font, CorelDRAW takes into consideration the rights of the font designer. Designer permissions affect what can be done with text in that font, when used on a computer that doesn’t have the font installed.
There are four possible types of embedded font permissions, which can be seen in the font filters.
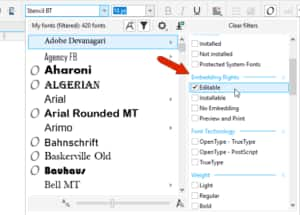
- Editable means that text in this font can be edited and used on any system.
- Installable is similar to editable, and also allows the font to be installed on a computer that doesn’t yet have the font.
- With Preview and Print, any text in these fonts can be printed, or viewed in Print Preview, but cannot be edited.
- No embedding means that the font cannot be embedded at all. Text that uses these fonts will be converted to curves when saving and cannot be edited as text.
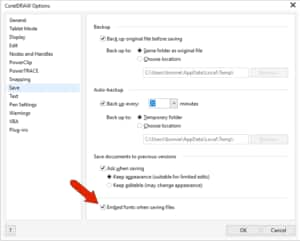
Returning to the CorelDRAW Options, the Save page has an option to automatically embed fonts when saving.
And in the Warnings page, there is an option to be warned when fonts cannot be embedded.

Start your FREE 15-day trial and embark on a design journey with powerful tools for vector illustration, layout, photo editing, typography, and collaboration.
