
Paragraph text is great for adding large pieces of text to a document. This tutorial covers some of the many features of paragraph text in CorelDRAW, including options for formatting, styles and layout, how to wrap text around graphics, and how to link text frames so that your copy flows from frame to frame – even across multiple pages.
Thanks for watching! You will find a written version of this tutorial below, and a printable PDF copy to download on the Download resources tab above.
Paragraph text is great for adding large pieces of text to a document. This tutorial covers some of the many features of paragraph text, including options for formatting, styles and layout, how to wrap text around graphics, and how to link text frames so that your copy flows from frame to frame – even across multiple pages.
Thanks for watching! We hope you found this tutorial helpful. You will find a written version of this tutorial below, and a printable PDF copy to download on the Download Resources tab above.
Start your FREE 15-day trial and embark on a design journey with powerful tools for vector illustration, layout, photo editing, typography, and collaboration.
Download these free resources:
Written tutorial for Windows (PDF, 747 KB)
Written tutorial for Mac (PDF, 967 KB)
CorelDRAW Graphics Suite resources
Quick Start Guide (PDF, 2 MB)
Keyboard Shortcuts (PDF, 3.5 MB)
CorelDRAW and Corel PHOTO-PAINT user guides
For CorelDRAW Graphics Suite subscription and perpetual licenses (2018 to 2024), languages include English, Português do brasil, 简体中文, 繁體中文, Čeština, Deutsch, Español, Français, Italiano, 日本語, Polski, Русский
CorelDRAW Community
CorelDRAW learning center
Facebook
X (formerly Twitter)
YouTube
Working with Text
What’s New in CorelDRAW Graphics Suite
CorelDRAW tools
 CorelDRAW Graphics Suite
 Ultimate Vector Bundle Vol. 1
 CorelDRAW Standard 2021
 Ultimate Vector Bundle Vol. 2
 Corel Vector
Adding, formatting and wrapping paragraph text in CorelDRAW
In this tutorial we will cover how to add, edit and format paragraph text, how to use placeholder text, how to wrap text around graphics and how to link text frames so that the text flows from frame to frame, even across pages.
Click on any of the images below to view full-size.
To add paragraph text, activate the Text tool and drag to create a text frame.
NOTE: If you are adding text from another CorelDRAW file created before version X6, you’ll be asked to update text. Look for a blue bar across your workspace and be sure to click the Update button. This will allow you to make use of the Open text features as well as align text with the baseline grid.
Inserting placeholder text
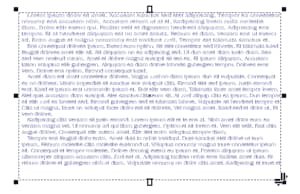
If you do not have the final text for your project but want to lay out the page to see how the text will look, you can use placeholder text. With the Pick tool, right-click in the text frame and choose Insert Placeholder Text. This brings in the standard Lorem Ipsum text, with the default font and size for paragraph text. There is just enough placeholder text inserted to fit the frame exactly.

Note: If you want to use placeholder text other than the default Lorem Ipsum text, be sure that your text is saved in a file called placeholder.rtf and saved in your Documents > Corel > Corel Content folder. If this file is in the wrong folder, or has the wrong name, the default Lorem Ipsum text will be used.
You can change text properties in the Property Bar or Text docker or assign a color. You can also add bullets or drop caps.
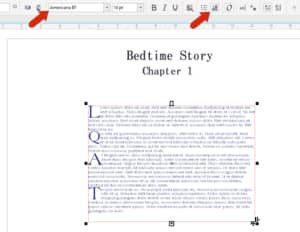
The right-pointing icon at the lower right corner of the text frame can be used to adjust kerning, and with the Shift key pressed you can use the same icon to adjust word spacing. The down-pointing icon controls the leading, or line spacing.
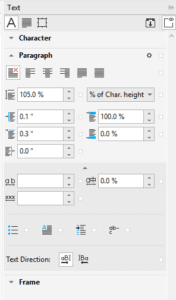
The Paragraph section of the Text docker also has options for adjusting line spacing, as well as paragraph indents and paragraph separation. You can expand this section for character and word spacing options.
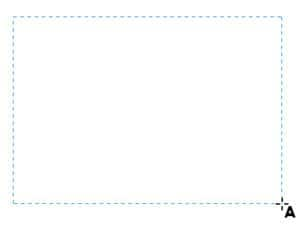
A red dashed line around the text frame indicates that the text exceeds the size of its frame.
You can fix this by resizing the frame, but sometimes a larger frame isn’t large enough. Another way to make the text fit perfectly is to right-click in the frame and choose Fit Text to Frame. The font size will adjust to fit.
If text in your frame is a bit unwieldy at the current frame width, use the Text docker to change the number of columns.
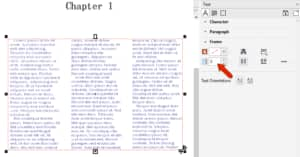
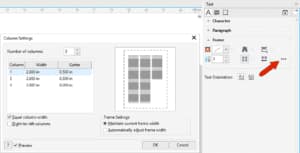
To change column formatting, click the 3-dot icon. This opens the Column Settings window, where you can change the gutters, set unequal widths, etc.
The Layout toolbar also has a column icon, and you can access this toolbar by right-clicking on a blank toolbar area and choosing Layout.

Paragraph text wrapping
If your document includes graphics, you can make the text wrap around them.

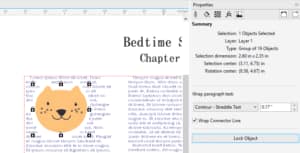
Select the graphic objects, and in the Properties docker, open the Summary tab. By default, the Wrap paragraph text option is set to None.
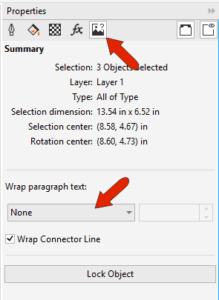
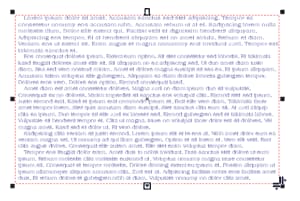
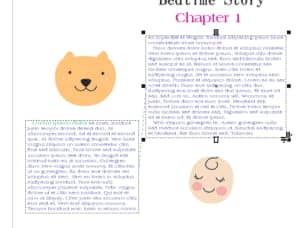
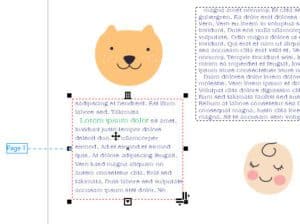
Wrap options include left or right flow, straddle around the graphic contour, square border, or above / below. In this example, the text straddles the image, with a specified offset. The graphic can also be locked, so that it can’t be moved.
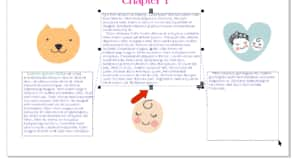
If the graphics are unlocked, then after moving a graphic or resizing the text frame, the text will adjust.
Text styles
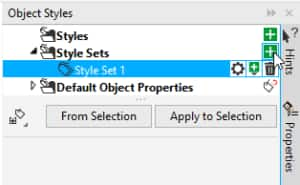
Text styles can be created so that the current style can easily be reused. In the Object Styles docker open, click the plus icon to add a new style set.
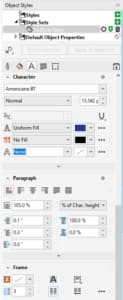
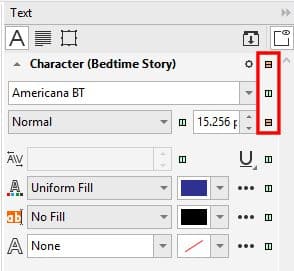
Drag the text frame directly onto this new style set, to fill in its properties for outline, fill, character, paragraph, and frame. You can right-click on the new style set in the list in the docker and choose Rename, and then enter a name for your new style set. In this example we named our style set “Bedtime Story.”
Styles can be applied to both paragraph and artistic text, so a style set can be created for chapter headers as well.
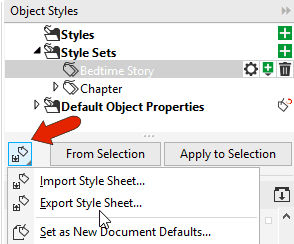
These style sets will be available while working in the current document. If you want styles available for other documents, click on the Import, export or save defaults icon to export them. In a new document, click on this same icon to import the style(s) you exported.
Linking text frames
In this example, a one-column text frame is placed in the middle of the page, containing placeholder text.

For the purpose of this example, we made the first few words a new color and size so they can be easily seen, then selected the text frame again.
We want the text on this page to start in a frame to the left, so click the Text Flow tab at the top of the frame.

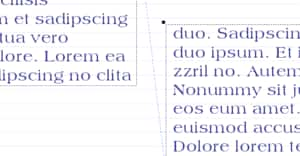
Then click and drag to create a new frame to the left. The text now starts in the left frame and flows to the original frame in the center.
Similarly, you can click the Text Flow tab at the bottom to create a frame whose text continues after this one.
All three frames are now linked. If you edit the text and add new lines, the flow updates in the other frames. And if you right-click in any frame to fit text, the text in all three frames will adjust.
In the Text docker there are small boxes beside each formatting option – some may be green while others are orange. An orange box indicates a change made from the default properties in the text style, for example, the font size.
If you click on an orange box, you will have the option to revert back to the default property for the style.
Aligning to Baseline Grid
If you zoom in on your document and notice that the text lines in linked frames don’t align perfectly, you can use the Baseline Grid to fix this. Display this grid by going to View > Grid > Baseline Grid. This grid looks like lined notebook paper.
Hold down the Shift key and use the Pick tool to select all linked text frames, then right-click in any frame and choose Align to Baseline Grid. To adjust the grid spacing, go to Layout > Document Options, open the Grid tab and adjust the baseline grid spacing.
Linking text frames across pages
If you have text frames on multiple pages, you can link them from page to page so that the text will continue to flow. Select the last frame on page 1 and click its bottom Text Flow tab. Then on page 2, click where you want the text to continue. You will see an indicator that the text is flowing from the previous page.
When you return to page 1 and select the last frame, you will see where the text is flowing to.

If there are no text frames on subsequent pages that you can link to, a text frame can be automatically created. First, click the Text Flow tab at the bottom of the frame on page 1. Then on page 2, you will see an outline of where the frame would be if you wanted it in the same spot as on page 1. Click in this outline to duplicate the text frame and add the flowing text.

Start your FREE 15-day trial and embark on a design journey with powerful tools for vector illustration, layout, photo editing, typography, and collaboration.
