
Here are some helpful font management tips for CorelDRAW. Watch this tutorial to learn about the difference between installed and non-installed fonts, how to find and filter fonts, and how to use the Font Sampler to compare fonts.
Thanks for watching! We hope you found this tutorial helpful and we would love to hear your feedback in the Comments section at the bottom of the page. You will find a written version of this tutorial below, and a printable PDF copy to download on the Download Resources tab above.
Start your FREE 15-day trial and embark on a design journey with powerful tools for vector illustration, layout, photo editing, typography, and collaboration.
Download these free resources:
Written tutorial for Windows (PDF, 703 KB)
Written tutorial for Mac (PDF, 916 KB)
CorelDRAW Graphics Suite resources
Quick Start Guide (PDF, 2 MB)
Keyboard Shortcuts (PDF, 3.5 MB)
CorelDRAW and Corel PHOTO-PAINT user guides
For CorelDRAW Graphics Suite subscription and perpetual licenses (2018 to 2024), languages include English, Português do brasil, 简体中文, 繁體中文, Čeština, Deutsch, Español, Français, Italiano, 日本語, Polski, Русский
CorelDRAW Community
CorelDRAW learning center
Facebook
X (formerly Twitter)
YouTube
What’s New in CorelDRAW Graphics Suite
Working with Text
 CorelDRAW Graphics Suite
 Ultimate Vector Bundle Vol. 1
 CorelDRAW Standard 2021
 Ultimate Vector Bundle Vol. 2
 Corel Vector
Font Management Tips
In this tutorial, we’ll share a variety of font management tips for installed vs not-installed fonts, finding and filtering fonts, and font comparison in CorelDRAW.
Click on any of the images below to view full-size.
Installed Fonts
As discussed in previous tutorials in this series, you probably have hundreds of fonts on your computer. Some were included with Windows, others may have been added when installing other applications, and others may have come from font websites. From within CorelDRAW, the Get More link has a Fonts page, from where you can bring in a wealth of additional fonts, some for free and some for purchase.

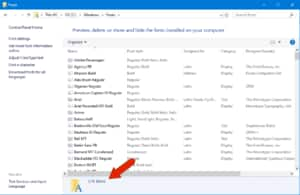
To see what fonts are installed on your PC, open the Windows > Fonts folder. In this example, 276 fonts are installed. All these fonts can be used for any application on this computer. In Details view you can see font styles, designers, embeddability, etc.
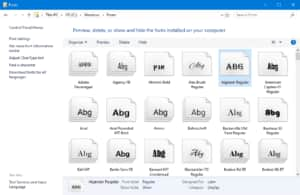
If you switch to Icon view or Tiles view, you can see how each font looks.
Double-clicking a font opens a preview window in which you see all characters.
CorelDRAW-Available Fonts
In contrast, activate the Text tool in CorelDRAW and open the fonts list in the Property Bar. In this example, there are 1477 available fonts.
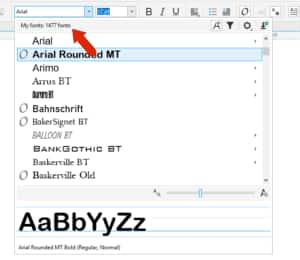
Some of these are the ones installed on this PC, but the rest are not installed. CorelDRAW can access fonts that aren’t installed in Windows, and these non-installed fonts are available only in CorelDRAW, not in any other applications.
As an example, after downloading a set of fonts from Corel Content, these are placed in Documents > Corel > Corel Content > Fonts. “Fonts” is one of CorelDRAW’s watched folders, so any font here will appear in CorelDRAW’s font list. Unless also installed in Windows, fonts here can’t be used in Microsoft Word or Outlook. But they can be used in CorelDRAW.
The Fonts folder, and all folders inside it, are automatically watched folders in CorelDRAW, and you can use the Font Manager to mark other folders to watch.
To learn more, watch the full tutorial Using the Font Manager.
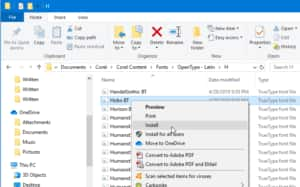
Any CorelDRAW-only font can be installed in Windows – simply right-click on a font and choose Install.
However, keeping a large number of installed fonts can unnecessarily weigh down your system. The most efficient way to store fonts that you’ll only be using in CorelDRAW is to keep them in a folder within the Corel Content > Fonts file structure.
CorelDRAW’s Font List
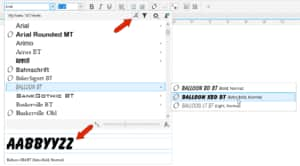
While Preview is enabled, you can hover over any font to see how it looks with default characters. You can also preview fonts that are within font families.
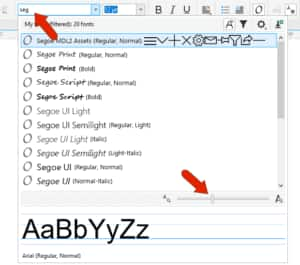
You can increase the size of the font names with the slider, and you can find a specific font by starting to type its name in the font field.
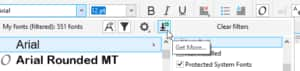
Click Show Filter List to narrow the font list according to a variety of criteria. For example, listing only installed or protected system fonts reduces the list to those installed in Windows.
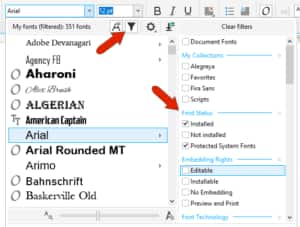
Not Installed displays fonts in CorelDRAW’s watched folders. You can also show only fonts that are editable or installable. Or filter by font technology, weight, width, style, language, etc. Checking Document Fonts shows only those fonts currently in use in your CorelDRAW document.
Font collections can be created in the Font Manager, which is covered in a separate tutorial. Fonts downloaded from Corel will automatically be added as a font collection.
You can bring the entire font list back by clicking Clear Filters at the top.
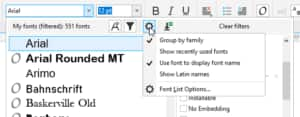
The Font Options icon opens a list of options that include grouping by family, displaying recently used fonts at the top of the list, and using the font to display the font name. Show Latin Names will display non-Latin font names in Latin characters.
Clicking Font List Options opens the program options to the Text page, with the familiar options for display, font matching, and writing tools.
Click Get More to open the list of font packs you can purchase or download from Corel.
Comparing Fonts
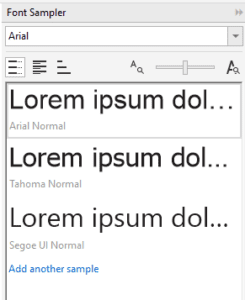
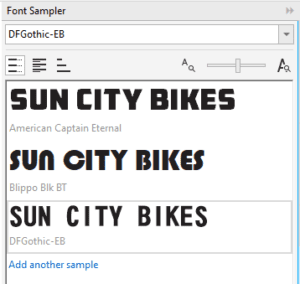
The Font Sampler docker can be used to compare fonts applied to the same text string. Users of previous versions of CorelDRAW will recognize this docker as the former Font Playground. By default, the docker opens with three samples in standard fonts, using the default Lorem Ipsum text.
To change the fonts, click each sample and set a different font.
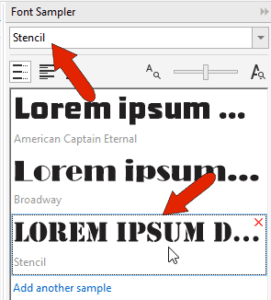
You can add another font by clicking Add another sample.
Drag and drop to rearrange the list and click a sample’s X icon to delete it. You can change the sample text size with the slider.
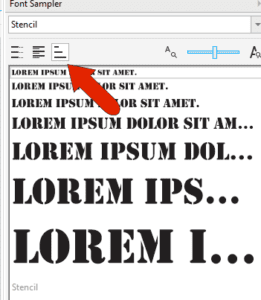
The default view is Single Line, but you can switch to Multi Line to see the entire sample text. Or switch to Waterfall view to display sample text in the selected font, in different sizes which you can adjust.
To compare fonts using the actual text in your document, simply edit the text, and select and copy it with Ctrl + C. Then in blank space in the Font Sampler, use Ctrl + V to replace the current default text. You can paste in text copied from another application as well.
You can make changes to individual samples by double-clicking and editing, though that affects only one sample.
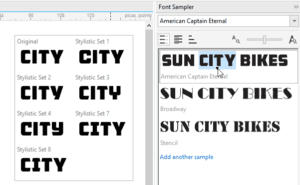
If the sample text you’re editing uses an OpenType font, you can edit and select characters to see if any OpenType features are available, as indicated by the triangle. When you click the triangle, the other options for the characters are displayed, and you can select the option to use.
When you’ve chosen the font to use, select it and click the Copy button. Then activate the Text tool and paste in the copied text.

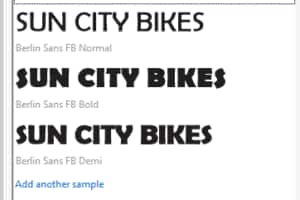
The Font Sampler is also handy for comparing fonts in a font family, such as these three samples of the Berlin Sans FB family.
Start your FREE 15-day trial and embark on a design journey with powerful tools for vector illustration, layout, photo editing, typography, and collaboration.
