The mosaic text effect in CorelDRAW lets you use other text or symbols as a fill when creating a unique and eye catching title. Use mosaic text to create a professional looking poster or use it for birthday cards, letterheads, and even watermarks. This simple text effect gives you one more tool at your side when creating the perfect look on your design project.
Thanks for watching! We hope you found this tutorial helpful. You will find a written version of this tutorial below, and a printable PDF copy to download on the Download Resources tab above.
Start your FREE 15-day trial and embark on a design journey with powerful tools for vector illustration, layout, photo editing, typography, and collaboration.
Download these free resources:
Written tutorial (PDF, 1 MB)
CorelDRAW Graphics Suite resources
Quick Start Guide (PDF, 2 MB)
Keyboard Shortcuts (PDF, 3.5 MB)
CorelDRAW and Corel PHOTO-PAINT user guides
For CorelDRAW Graphics Suite subscription and perpetual licenses (2018 to 2024), languages include English, Português do brasil, 简体中文, 繁體中文, Čeština, Deutsch, Español, Français, Italiano, 日本語, Polski, Русский
CorelDRAW Community
CorelDRAW learning center
Facebook
X (formerly Twitter)
YouTube
Working with Text
What’s New in CorelDRAW Graphics Suite
 CorelDRAW Graphics Suite
 Ultimate Vector Bundle Vol. 1
 CorelDRAW Standard 2021
 Ultimate Vector Bundle Vol. 2
 Corel Vector
How to Create a Mosaic Text Effect
In this tutorial, you will learn how to use:
- The Text tool
- The Fountain Fill tool
- The PowerClip tool
STEP 1: Create Placeholder Text
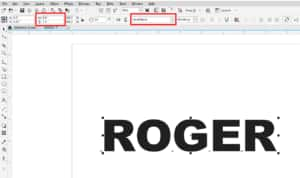
Start with a new document that is 11 inches wide by 8.5 inches high. Click on the Text tool and type a word. In this example, we will be using the name Roger, but you can use any text you like. This will serve as your text placeholder later in this project.
On the property bar, set the font to Arial Black and then set its Object size to 8 x 1.5 inches. Next, press P on your keyboard to set its alignment to center.
STEP 2: Create and Fill Paragraph Text Frame
With the Text tool, click and drag to create a paragraph text frame. On the property bar, set the Object size to 10 x 6 inches.
Fill in the paragraph text frame with the same text that you are using for your text placeholder.
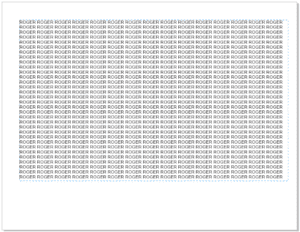
TIP: you can use the Pick tool to move the paragraph text frame off to the side of the drawing window, so it is not on top of the placeholder text.
STEP 3: Adjust Paragraph Text Spacing
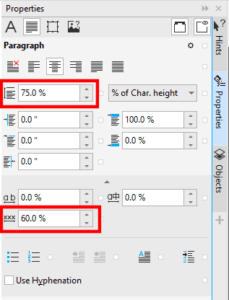
On the Properties docker, click on the Paragraph tab. Center the text, then set the Line spacing to 75% and the Word spacing to 60%.
STEP 4: Add a Fountain Fill
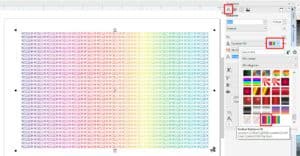
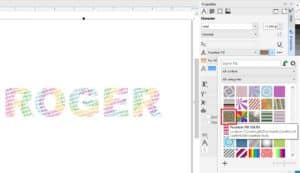
On the Properties docker, click on the Character tab. Set the Fill type to Fountain Fill. In the Text Color dropdown, select the fill you want to use. In this example we are using a rainbow fill.
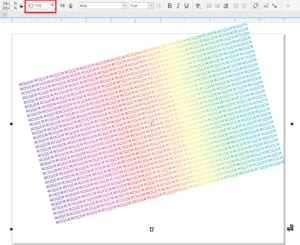
STEP 5: Rotate Paragraph Text Frame
Now we are going to rotate the paragraph text frame by going to the Angle of Rotation field on the property bar and setting the value to 15 degrees.
STEP 6: PowerClip
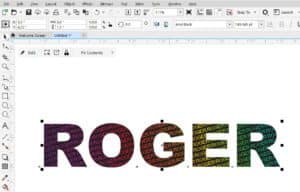
With the paragraph text frame still selected, go to the Object menu and select PowerClip > Place Inside Frame. Your cursor will become a black arrow – use this to click on the center of your placeholder text created in Step 1.
STEP 7: Remove Color
Finally, while the placeholder text is still selected, remove its color by clicking on the No Color swatch in the Color palette.
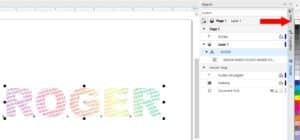

STEP 8: Changing the Fill (optional)
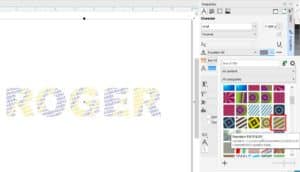
If you want to experiment with different looks, you can change the fountain fill. First, make sure you have the paragraph text selected, not the placeholder text. You can do this easily by selecting that layer in the Objects docker.
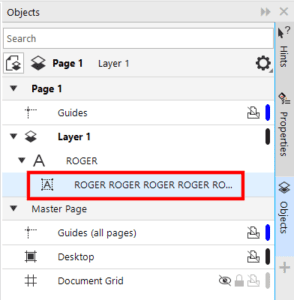
Then on the Character tab of the Properties docker, select a different fill from the Text Color dropdown.
Start your FREE 15-day trial and embark on a design journey with powerful tools for vector illustration, layout, photo editing, typography, and collaboration.

