
In this tutorial, we’ll explore each of the features of CorelDRAW’s Status bar, which runs along the bottom of the interface. The properties of the Status bar can be easily customized to show information about tools or objects, to reposition it elsewhere in the interface, and to include additional commands for your most frequently used tools and features.
Thanks for watching! We hope you found this tutorial helpful. You will find a written version of this tutorial below, and a printable PDF copy to download on the Download Resources tab above.
Start your FREE 15-day trial and embark on a design journey with powerful tools for vector illustration, layout, photo editing, typography, and collaboration.
Download these free resources:
Written tutorial (PDF, 434 KB)
CorelDRAW Graphics Suite resources
Quick Start Guide (PDF, 2 MB)
Keyboard Shortcuts (PDF, 3.5 MB)
CorelDRAW and Corel PHOTO-PAINT user guides
For CorelDRAW Graphics Suite subscription and perpetual licenses (2018 to 2024), languages include English, Português do brasil, 简体中文, 繁體中文, Čeština, Deutsch, Español, Français, Italiano, 日本語, Polski, Русский
CorelDRAW Community
CorelDRAW learning center
Facebook
X (formerly Twitter)
YouTube
What’s new in CorelDRAW Graphics Suite
Introduction to CorelDRAW
 CorelDRAW Graphics Suite
 Ultimate Vector Bundle Vol. 1
 CorelDRAW Standard 2021
 Ultimate Vector Bundle Vol. 2
 Corel Vector
Exploring the Status bar in CorelDRAW
In this tutorial, we’ll review the icons and options on CorelDRAW’s Status bar.
Click on any of the images below to view full-size.
By default, the Status bar runs along the bottom of the CorelDRAW workspace, below the Document Navigator and Document Palette.

For Windows users, if you don’t see the Status bar, right-click in any toolbar area and toggle on Status bar.
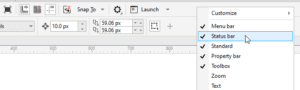
The Window > Toolbars menu is another place where you can toggle toolbars on and off. For Mac users, if the Status bar is not displayed, choose View > Show Status bar.
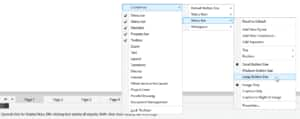
For Windows users, right-clicking in the Status bar itself opens a menu where the first option is Customize. You can set the default button size for all toolbars, or just for the Status bar. We’ll look at other customization options a bit farther on.
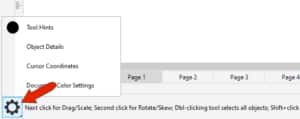
Also by default, the Status bar for Windows users displays Tool Hints about the currently active tool. For example, when the Pick tool is active, the Status bar lets you know what single and double-clicks do, as well as what happens when you add modifier keys such as Shift or Alt. Tool hints change each time you activate a new tool.

To set the Status bar to display different things, click the Gear icon.
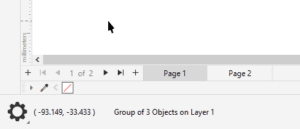
Switch to Object Details (which is the default Status bar setting for the Mac version) and activate the Pick tool. As you would expect, object details depend on what’s selected. For example, while a group is selected, you can see its dimensions and center point coordinates, number of objects, and its layer.
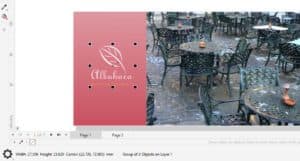
For a selected image you would also see its type and resolution, and for selected text you would see its position and font details.
Switch to Cursor Coordinates, and the coordinates update as you move your cursor around.
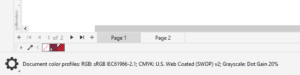
You can also view Document Color Settings which displays the color profiles that have been selected for this document.
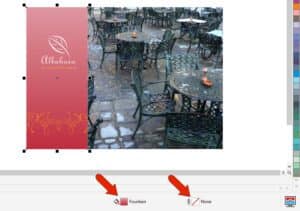
On the right side of the Status bar are icons that display fill and outline properties for the currently selected object. For example, for this selected rectangle has a fountain fill and no outline.
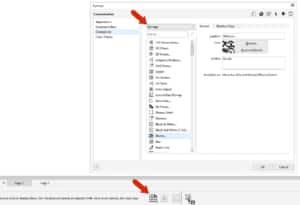
Double-clicking the Fill icon opens the Edit Fill window, in which all fill properties can be edited.
Similarly, double-clicking the Outline icon opens the Outline Pen window, in which outline properties can be edited.
At the end of the Status bar is an icon to toggle on or off Proof colors, which simulates how the printed output will look.

Customizing the Status bar
The options that appear when you right-click in the Status bar and choose Customize > Status bar are available in the Windows version of CorelDRAW Graphics Suite, but are not available in the Mac version, CorelDRAW Standard or CorelDRAW Essentials.
With the Add New Command option, you can add frequently used commands to the Status bar.
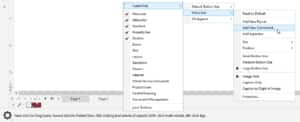
For example, if you work often with bitmaps, you may want quick access to Bitmaps tools. You can drag icons from the Options window right into the Status bar and remove icons by dragging them off.
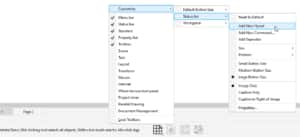
Another way to remove an icon from the Status bar is to right-click on the icon and choose Customize > Status Item > Delete.
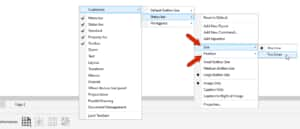
To add a separator line to the Status bar, right-click on the icon to the right of where you want the separator and choose Customize > Status bar > Add Separator.
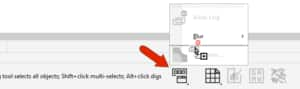
You can also add an entire toolbar flyout.
The flyout comes in empty, but you can use the Add New Command option to populate the flyout. Drag each command icon onto the flyout, then drag it into the correct position within the flyout.
You can use the Position option to place the Status bar along the top instead of the bottom, and with the Size option you can increase the Status bar to two lines.
With a two-line Status bar, you can display, for example, both Tool Hints and Object Details, and add command icons to both lines.

Finally, the Customize menu for the Status bar also has a Properties option. When Status bar is selected on the left, many of the customization options here can be set on the right.
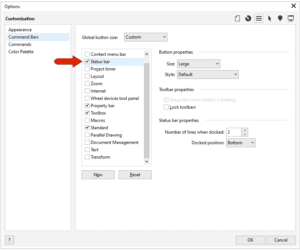
Start your FREE 15-day trial and embark on a design journey with powerful tools for vector illustration, layout, photo editing, typography, and collaboration.
