
Learn how to create a multi-color gradient fill, also known as a fountain fill, that can be applied to shapes, text and other objects in CorelDRAW. In this tutorial we’ll cover how to create a simple 2-color gradient, how to add more colors and make other adjustments, how to copy gradients to another object, and how to create your own custom gradient presets.
Thanks for watching! We hope you found this tutorial helpful. You will find a written version of this tutorial below, and a printable PDF copy to download on the Download resources tab above.
Start your FREE 15-day trial and embark on a design journey with powerful tools for vector illustration, layout, photo editing, typography, and collaboration.
Download these free resources:
Written tutorial (PDF, 943 KB)
CorelDRAW Graphics Suite resources
Quick Start Guide (PDF, 2 MB)
Keyboard Shortcuts (PDF, 3.5 MB)
CorelDRAW and Corel PHOTO-PAINT user guides
For CorelDRAW Graphics Suite subscription and perpetual licenses (2018 to 2024), languages include English, Português do brasil, 简体中文, 繁體中文, Čeština, Deutsch, Español, Français, Italiano, 日本語, Polski, Русский
CorelDRAW Community
CorelDRAW learning center
Facebook
X (formerly Twitter)
YouTube
What’s new in CorelDRAW Graphics Suite
Introduction to CorelDRAW
Color, fills and transparency
 CorelDRAW Graphics Suite
 Ultimate Vector Bundle Vol. 1
 CorelDRAW Standard 2021
 Ultimate Vector Bundle Vol. 2
 Corel Vector
How to create gradients (Fountain fills) in CorelDRAW
In this tutorial, we’ll learn how to create and edit gradients, which are called Fountain fills in CorelDRAW.
Click on any of the images below to view full-size.
How to add a gradient
Gradients can be applied to shapes, text, and any other object that is a closed curve. Gradients cannot be applied to lines or bitmaps.
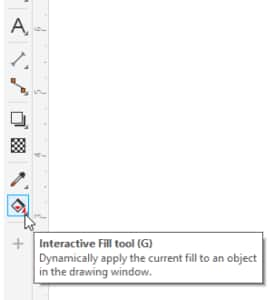
Gradient fills are added with the Interactive Fill tool, which is located at the bottom of the Toolbox, and can be activated with the G shortcut.
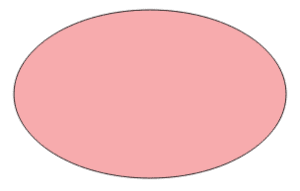
We’ll start with a closed shape, such as an ellipse, that is filled with a uniform color.
Activate the Interactive Fill tool, then click on the ellipse. The property bar contains the set of fill options, and Uniform is currently selected, since the ellipse has a uniform (solid) color fill.
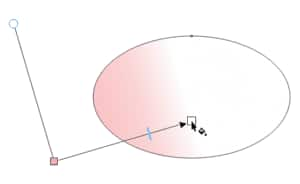
If we select the Fountain Fill option, the fill will automatically change from a solid fill to a gradient fill. By default, the gradient proceeds linearly, from the full uniform fill color at the left to white on the right.
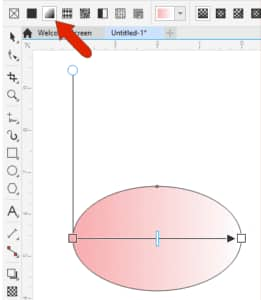
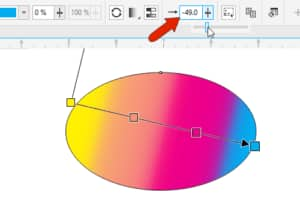
Each of the controls can be used to adjust the gradient. You can drag either color node to adjust where the gradient begins and ends, drag the slider to adjust the rate of change, and drag the round node to adjust the angle.
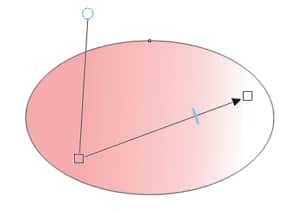
You can click and drag, within the curve or outside, to start the gradient over. When you click and drag to add a gradient, you can specify the starting point and angle instead of the default left to right horizontal gradient.
Changing gradient colors
There are several ways to change gradient colors:
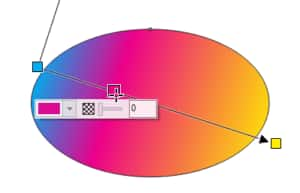
- You can click either color node and use the attached color picker to choose a new color.
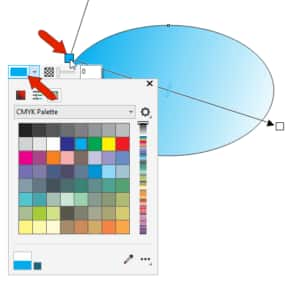
- You can drag a swatch from the Color palette directly onto a color node.
- Gradient colors can be changed on the property bar as well. Clicking a color node displays that color, which can be changed in the Node color dropdown.
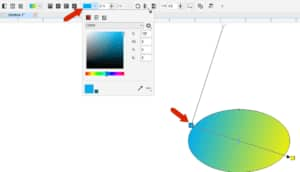
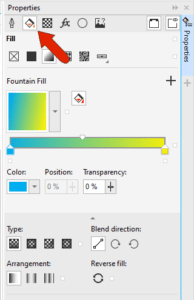
- All gradient properties can also be adjusted on the Fill tab of the Properties docker or inspector for Mac users. To open the Properties docker, go to Window > Dockers > Properties, or click the plus icon (3-dot icon for Mac users) below the tabs of open dockers.
Creating a multi-color gradient
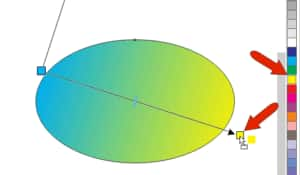
Gradients are not limited to just two colors. You can add an intermediate color by dragging a swatch onto the gradient line.
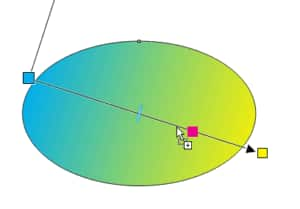
Then adjust the position of the new node.
You can also double-click along the gradient line to add a new color node. The new node will be placed where you click and is assigned a color along the range, but you can change the color using any of the methods described earlier.

An intermediate node can be removed by double-clicking on it.
Editing and modifying gradients
In addition to changing gradient colors, there are other options on the property bar and Properties docker to modify gradients. For example, Reverse Fill switches color direction.
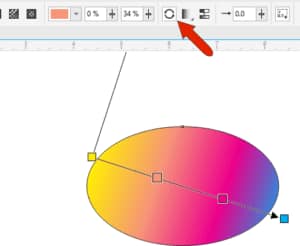
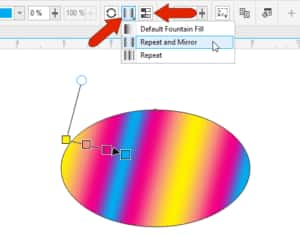
You can shorten the gradient line, which maintains the proportional distance between intermediate nodes. Then switch from the default arrangement to Repeat and Mirror or Repeat. The Smooth option smooths the transitions between colors.
You can use the Acceleration slider to adjust how quickly the colors blend from one to the next. The default acceleration is 0.
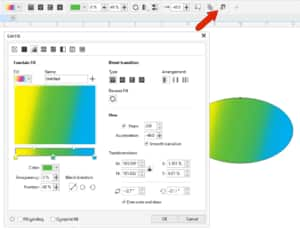
For more precise gradient editing, click the Edit Fill icon, where all gradient options appear in a single window. You can see edits in real time and on the preview.
Types of Fountain fills
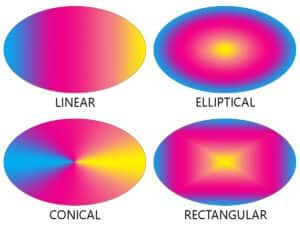
Linear fountain fill is the default, but there is also:
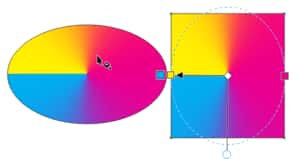
- Elliptical which gradually changes color in concentric ellipses from the center outwards
- Conical which gradually changes color in a conical shape, giving the appearance of looking down on a 3D cone
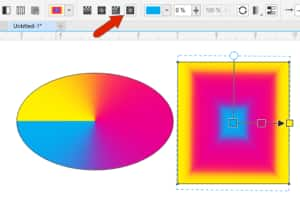
- Rectangular which gradually changes color in concentric rectangles from the center outwards
Copying gradients to other objects
You can copy a gradient from one object onto another. In this example, we want to copy the gradient from the ellipse onto the rectangle. Select the rectangle and activate the Interactive Fill tool. On the property bar, click the Copy Fill icon.
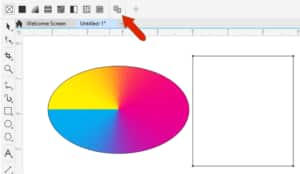
Your cursor will become an arrow – use this to click on the fill of the ellipse to apply it to the rectangle.
The gradient fill on the rectangle can now be adjusted with any of the settings and options previously mentioned.
Creating a translucent gradient
Adding translucency to gradient color nodes is a nice way to add realistic shading or overlay effects.
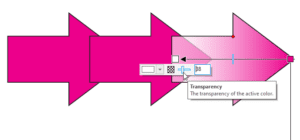
In this example of three arrows, activate the Interactive Fill tool, and click the arrow on the right to select it. Click and drag on the object to change the Uniform fill to Fountain fill, keeping Shift pressed so the gradient line stays horizontal.
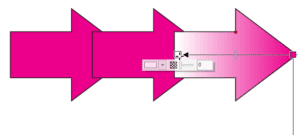
Instead of solid white at the start, click the color node and increase its transparency. This can be done on the property bar or Properties docker as well.
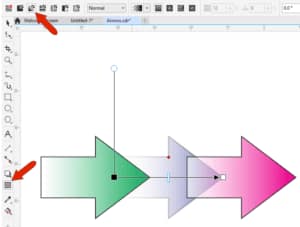
Now you can use the Pick tool to select the other arrows, activate the Interactive Fill tool, use the Copy fill icon to get the same gradient, and replace the non-translucent colors.

Note that the Transparency tool also has a Fountain Fill option. The gradient interaction appears similar, but only transparency properties can be assigned or adjusted. Also, the settings affect the entire object, including both outline and fill.
To learn more about the Transparency tool, watch our full tutorial How to use the Transparency tool.
Adding gradients to text
As mentioned at the beginning, gradients can be applied to text, whether or not the text is converted to curves.
Create text with the Text tool, select it with the Pick tool, then activate the Interactive Fill tool and add a gradient, just as we’ve done with the ellipse. Once you’ve added a gradient, you can make any adjustments, such as switching to an Elliptical fountain fill, adjusting the limits, and adding more colors along the gradient line.

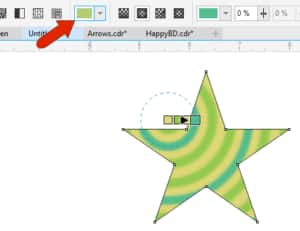
Using preset gradient fills
CorelDRAW includes some preset fountain fills you can choose from, in the Fill picker dropdown. Each can be adjusted as needed.
In the Fill picker dropdown, there is also a Get More icon.

Clicking the Get More icon opens the Store in the Welcome Screen, where you can find the free Fountain Fills Bundle.
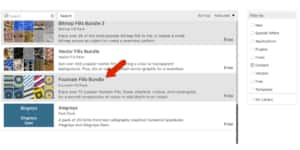
Installing is easy, just click the bundle, download it and install. Once installed, there are over 70 fills to choose from.
Creating and saving custom gradient fills
If you’ve created your own fountain fill or edited one of the presets, you can save the fill for later use.
Click the Save custom fill (plus) icon in the Properties docker, or on the Fill picker dropdown.
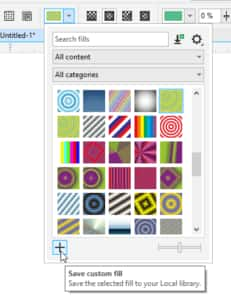
Assign a name and add the fill to an existing category or create a new category. The saved fill will then appear in its category in the Fill picker dropdown.
Start your FREE 15-day trial and embark on a design journey with powerful tools for vector illustration, layout, photo editing, typography, and collaboration.
