
Since 2020, CorelDRAW Graphics Suite offers two new upsampling features that allow you to repurpose low-resolution images for print projects and create large designs from smaller graphics. One is JPEG artifact removal and the other is upsampling to increase an image’s size while still maintaining its quality. Both features draw on machine learning models, in which pixels are analyzed, changed, or added, to maintain sharpness and fine details.
Thanks for watching! You will find a written version of this tutorial below, and a printable PDF copy to download on the Download resources tab above.
Start your FREE 15-day trial and embark on a design journey with powerful tools for vector illustration, layout, photo editing, typography, and collaboration.
Download these free resources:
Written tutorial for Windows (PDF, 347 KB)
Written tutorial for Mac (PDF, 371 KB)
CorelDRAW Graphics Suite resources
Quick Start Guide (PDF, 2 MB)
Keyboard Shortcuts (PDF, 3.5 MB)
CorelDRAW and Corel PHOTO-PAINT user guides
For CorelDRAW Graphics Suite subscription and perpetual licenses (2018 to 2024), languages include English, Português do brasil, 简体中文, 繁體中文, Čeština, Deutsch, Español, Français, Italiano, 日本語, Polski, Русский
CorelDRAW Community
CorelDRAW learning center
Facebook
X (formerly Twitter)
YouTube
What’s new in CorelDRAW Graphics Suite
Working with bitmaps
Introduction to PHOTO-PAINT
 CorelDRAW Graphics Suite
 Ultimate Vector Bundle Vol. 1
 CorelDRAW Standard 2021
 Ultimate Vector Bundle Vol. 2
 Corel Vector
Improving image resolution
JPEG artifact removal and upsampling, introduced in CorelDRAW Graphics Suite 2020, allow you to increase image size while still maintain image quality and fine details. This tutorial will review how to remove JPEG artifacts and how to use the Illustration and Photorealistic upsampling modes.
Click on any of the images below to view full-size.
JPEG artifact removal
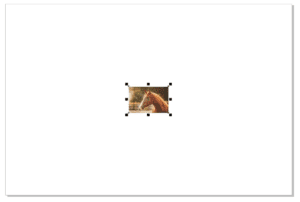
To demonstrate JPEG artifact removal, we’ll start with a photo of a horse that we want to enlarge and used for a large wall print. Start a new CorelDRAW document sized to match your print output.
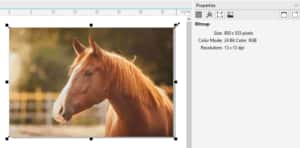
Use File > Import to bring in the bitmap image to use for the print, and press Enter to center it at its original size. In this example, the original image is much too small to fill the page.
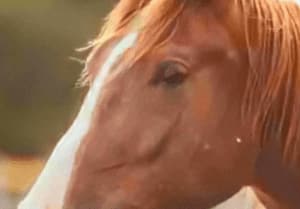
Zooming in a bit, we can see that the resolution is pretty low, and the image is full of JPEG artifacts. These are unwanted pixel blocks or halos caused by image compression, and there are lots of them along edges around the horse, as well as throughout the background.
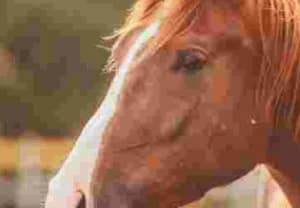
With the image selected, choose Bitmaps > Remove JPEG Artifacts. Within a couple of seconds, the entire image is now artifact-free, and edges are much sharper.
Upsampling a photo
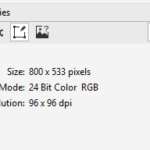
Now we want to increase the size of the photo to fit the page. If we look in the Properties docker, the current image resolution is 96 dpi.
You can enlarge the image by simply dragging one corner outward or using the Scale factors on the property bar. But these methods bring the image resolution way down to 13 dpi.
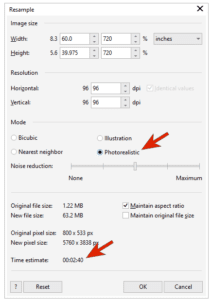
For a better resizing method, choose Bitmaps > Resample. Under Mode, there are two options: Bicubic and Nearest Neighbor. These modes are good options to use when making an image smaller.
We want our printed photo to be 60” x 40”, so we set the Width to 60. Because Maintain Aspect Ratio is checked, the Height updates accordingly.
Since we have increased the image size, there are now two additional modes available: Illustration and Photorealistic. Our image is a photo so we will use Photorealistic and set the Noise reduction slider to an average amount. The estimated time for resampling appears at the bottom of the window – this is useful to know if you’re resizing at a very large scale, because the upsampling may take a bit longer.
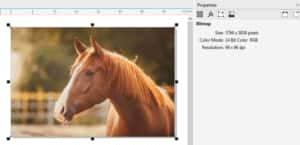
Click OK and the upsampling will process. Once complete, the image is enlarged. It looks just as crisp as the smaller version, and the resolution is still 96 dpi.
Upsampling an illustration
Computer-generated illustrations can be upsampled just as well. In this example, we have an illustration that’s to be used for an advertising poster, but it is much too small.
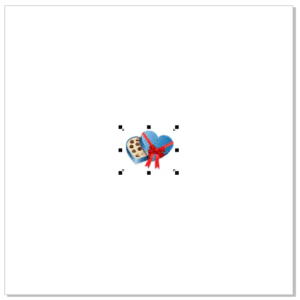
If you drag an image corner increase its size, there will be noticeable pixelation in some spots.

So we will use Bitmaps > Resample again, set the size we want, and this time choose the Illustration mode. Once the resampling is complete, the result is much crisper.

Start your FREE 15-day trial and embark on a design journey with powerful tools for vector illustration, layout, photo editing, typography, and collaboration.
