Understanding transparency is a key step for many photo editing projects, from simple picture frames and collages to complex composite images. In this tutorial we’ll introduce you to the basics of transparency, including file formats that support transparency and examples of how transparency is used in masks, collages and other PaintShop Pro elements. Our short exercises will show you how to use collage templates, picture frames and preset shapes with transparent elements.
Thanks for watching! We hope you found this tutorial helpful and we would love to hear your feedback in the Comments section at the bottom of the page. You will find a written version of this tutorial below, and a printable PDF copy to download on the Download Resources tab above.
Download your FREE 30-day trial and make every shot your best shot with PaintShop Pro, your all-in-one photo editing and design software.
Download these free resources:
Written Tutorial and Sample Images (Zip, 15 MB)
PaintShop Pro resources
Keyboard shortcuts (PDF, 173 KB)
PaintShop Pro User Guides
Partner and User websites
PaintShop Pro User Forum
Scrapbook Campus (Tips and tricks, workshops, master classes, and more)
Creation Cassel (Scripts, picture tubes, and other PaintShop Pro tools, plus weekly freebies)
PaintShop Pro Maniacs (Facebook group)
PaintShop Pro (Facebook group)
What’s New in PaintShop Pro
Working with Transparency
PaintShop Pro Tools
Featured products
 PaintShop Pro 2023 Ultimate
 AI HDR Studio 3.0
 PaintShop Pro 2023
 Vision FX 2.0
Understanding Transparency in PaintShop Pro
PaintShop Pro has many levels of photo transparency capabilities. This tutorial will help you understand transparency, learn what tools are available and see what’s possible to create with transparencies.
Open PaintShop Pro into the Edit tab.

- Under the Palettes menu, select Organizer (or press Shift+F9)
- In the Organizer, click the Show/Hide Navigation icon to bring up the Navigation window along the left side of the interface
- Navigate to the folder of images you downloaded for this tutorial. These images should now appear in the Organizer.
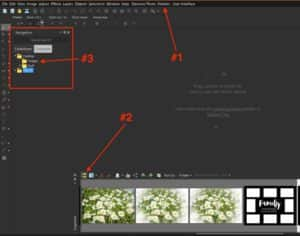
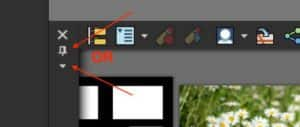
In the upper left corner of the Organizer, click either (A) the push pin so it lays down, or (B) the downward-pointing arrow and choose Auto Hide. The Organizer will now hide from view when not being accessed.
Using a Collage Template with Transparency
We’ll start by creating a collage of multiple images in one frame using the CollageTemplate.PNG file provided with this tutorial.
Open the collate template file. The most important items to note are the grey and white checkerboard patterns in each of the “windows”. These patterns indicate the transparent parts of this image. Using layers, you can put photos inside each of these windows and they will show through, because the windows are clear portions of the template.

Now open the sample images CollageSample1.JPG and CollageSample2.JPG. Activate the Pan tool.
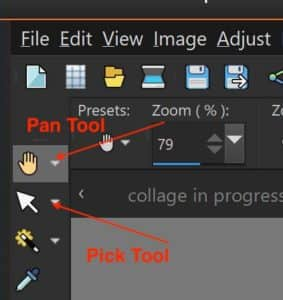
Right-click on the sample 1 image and select Copy (or use Ctrl+C). Go to the collage template, right-click and select Paste > Paste as New Layer (or use Ctrl+V).
TIP: You can also find copy and paste commands under the Edit menu.
Collage sample 1 should appear somewhere on top of the collage template. Your Layers palette should also contain a new layer of the sample image (Raster 2 layer) above the template (Raster 1 layer).
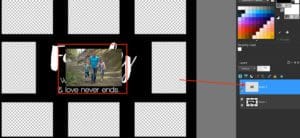
Activate the Pick tool and use it to move the sample image into one of the landscape-oriented windows. Now you need to place the image behind the template frame. In the Layers palette, click and drag the top layer (Raster 2) underneath the template layer (Raster 1).
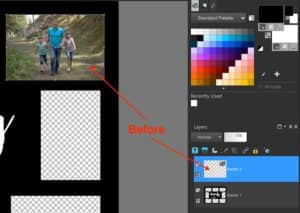
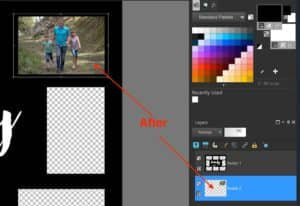
Repeat the same steps with CollageSample2.JPG to copy and paste it into the collage template, only this time place it in a vertical-oriented window.
NOTE: When you copy and paste images into a collage template, or any other PaintShop Pro file, they will be placed in the center of the screen. Depending on the size of your pasted image, and where it is in the layer order, it might not be immediately visible because it is hidden behind a non-transparent area of the collage template. If you activate the Pick tool and the layer of your pasted image, you will see the outline and corner handles of the image, even if it is hidden underneath another layer. You can also drag this layer to the top of the layers palette in order to better see it and move it into a collage window.
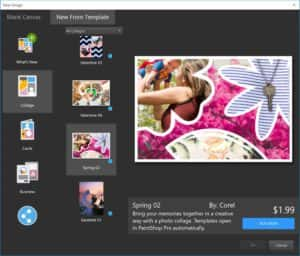
If you are looking for more collage templates, go to File > New From Template and browse the various categories. All these templates have transparent windows that you can place your photos into. Some of these templates are available as a free download.
Using a Picture Frame with Transparency
Let’s now try using a PaintShop Pro picture frame. In the Organizer, locate and open the image Blue Eggs.JPG (you can double-click on it or drag it into the main window).
Go to Image > Picture Frame. From the Picture frame dropdown list, locate and select the Birds picture frame
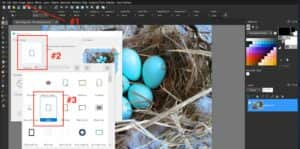
Note: If you can’t see the Birds frame in the picture frame library, go to the Welcome Book (by clicking on the house icon at the top of the PaintShop Pro interface). Click on Get More in the left menu then select the Creative Content tab. Scroll down to the bottom and select the Creative Content Pack. Click on the Download button and it will automatically install a collection of PaintShop Pro add-ons, including picture frames. Once you have installed this bonus content, the new picture frames will be visible in the picture frame library.
Once you have selected the Birds frame, check the options Keep Transparent and Frame outside of the image. Click OK to add the picture frame.
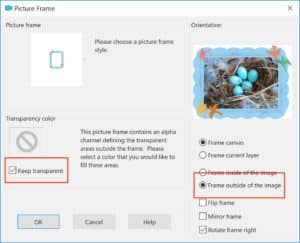
Note: You might see the blue eggs image extending beyond the outer edges of the picture frame. To fix this, activate the Pick tool and use it to reposition either the picture frame layer on top or the image layer underneath.
Preset Shapes and the Shape Cutter Tool
You can also use a preset shape to create a cutout image with a transparent background. There is even a special tool called the Shape Cutter, that greatly simplifies the process. In this example, we used the heart shape from the Preset Shapes library. You can find the preset shapes option as part of the Shape tool group flyout on the toolbar.
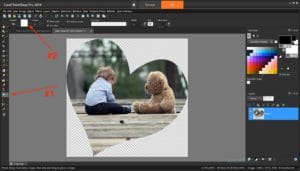
You can easily identify where the transparent regions are in both the bear image and in the Layers palette.
To use the Shape Cutter, select your shape and drag your mouse to draw the shape on top of your image. If you need to resize or reposition your shape, activate the Pick tool to do this. When the Shape tool is activated, you will see the Shape Cutter icon in the property bar. Click this to cut your image shape.

If you want to learn more about the Shape Cutter tool, watch this tutorial.
Using Transparency for Web Images
One of the key uses for transparency in digital images is to add them to a web page. One of the most web common uses is to place an image on a web page so that the web page’s background becomes your image’s background, such as a play button on a YouTube video, or your logo, or a product shot on your home page.
Go to the PaintShop Pro web page and you will see the product boxshots.

Right-click on either boxshot image and notice that it is an image (with options such as Save image as … etc). Simply drag and drop either box shot onto your desktop, then drag and drop that image into an empty PaintShop Pro window. The transparent background is indicated by the grey and white checkerboard background.
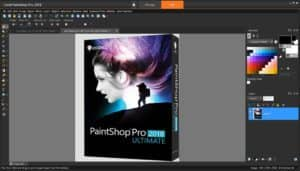
In conclusion, it’s very important to know what file formats will support transparencies, because not all do so. The most common format that supports it is PNG, which we’ve used here. GIF and JP2 (JPEG 2000) are also compatible. Regular JPGs do NOT support transparency. Once you’ve finished merging all your images into the final one, you can still save it as a JPG for sharing, but if you need to preserve the transparency you’ll want to save as a PNG.
Download your FREE 30-day trial and make every shot your best shot with PaintShop Pro, your all-in-one photo editing and design software.

