
In PaintShop Pro, the Pick tool is used to select and move images, objects, and layers. It can also be used to rotate, resize, and transform these elements. In this tutorial we will cover the basics of the Pick tool, as well as the transformations options like rotate, resize/scale, shear, and perspective.
Thanks for watching! We hope you found this tutorial helpful and we would love to hear your feedback in the Comments section at the bottom of the page. You will find a written version of this tutorial below, and a printable PDF copy to download on the Download Resources tab above.
Download your FREE 30-day trial and make every shot your best shot with PaintShop Pro, your all-in-one photo editing and design software.
Download these free resources:
Written tutorial (PDF, 2MB)
PaintShop Pro resources
Keyboard shortcuts (PDF, 173 KB)
PaintShop Pro User Guides
Partner and User websites
PaintShop Pro User Forum
Scrapbook Campus (Tips and tricks, workshops, master classes, and more)
Creation Cassel (Scripts, picture tubes, and other PaintShop Pro tools, plus weekly freebies)
PaintShop Pro Maniacs (Facebook group)
PaintShop Pro (Facebook group)
What’s New in PaintShop Pro
PaintShop Pro Tools
Getting Started with PaintShop Pro
Featured products
 PaintShop Pro 2023 Ultimate
 AI HDR Studio 3.0
 PaintShop Pro 2023
 Vision FX 2.0
How to Use the Pick Tool
In this tutorial, you’ll learn how to use the Pick tool in PaintShop Pro. The Pick tool lets you scale, rotate, and transform your images and elements.
You’ll learn how to use this tool to select, move, rotate, transform, or resize anything on the canvas.
Overview of the Pick Tool
To use the Pick tool, select the arrow icon in the Tools toolbar. Alternatively, you can press K on your keyboard.
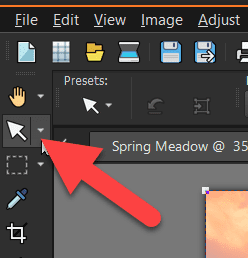
A bounding box with handles will appear.
- On the Tool Options palette, you can precisely scale and transform by setting specific values in any of the boxes.
- Or you can click and drag on the handles to manually adjust these values to your liking.
As you drag on the control handles, you will manipulate many of the variables you see in the Tool Options palette.
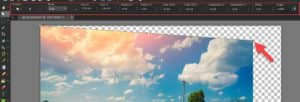
- Click on the element on the canvas to select it. Using the Pick tool, click and drag the element to move it wherever you want to on the canvas.
How to Resize Elements
- To resize an element while keeping the current proportions, select the layer and left-click while dragging one of the corner handles.
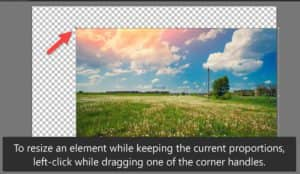
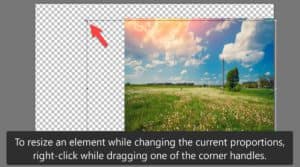
- To resize the layer while changing the current proportions, right-click while dragging a corner handle.
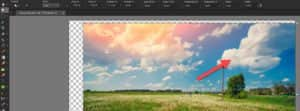
How to Rotate Elements
- To change the center of rotation, drag the rotation pivot point.
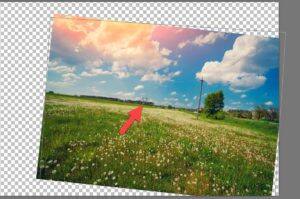
- Another way to rotate an element or layer is to hover your mouse over one of the corner edges and click and drag the rotation handle.
How to Change the Image Perspective
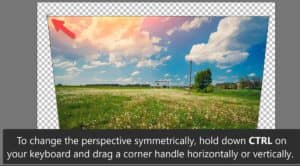
- To change the perspective symmetrically, hold down CTRL on your keyboard and drag a corner handle horizontally or vertically.
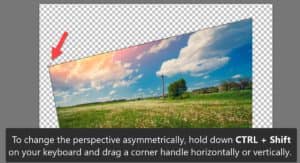
- To change the perspective asymmetrically, hold down CTRL + Shift, and drag a corner handle either horizontally or vertically.
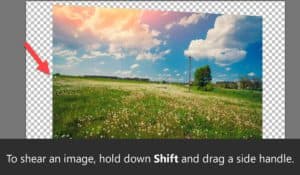
How to Shear an Image
Shearing skews an image vertically or horizontally.
- To shear an image, hold down Shift and drag a side handle.
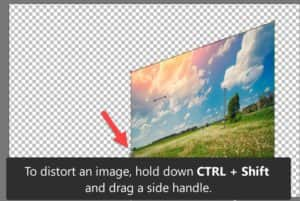
How to Distort an Image
Distorting an image stretches or contracts it in any direction.
- To distort an image, hold down CTRL + Shift, and drag a side handle.
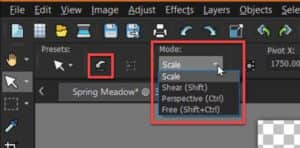
Mode Settings
You can see on the Tool Options palette that we are currently in the Scale mode, which is the default setting. While in the Scale mode, you must use the CTRL + Shift keys discussed previously to shear and transform your images.
To distort an image without holding down keys, you can choose one of the other Mode settings on the Tool Options palette.
- The Shear mode lets you shear without holding down Shift.
- The Perspective mode lets you change perspective without holding down Ctrl.
- The Free mode lets you distort without holding down Ctrl + Shift.
You can also select the Reset Rectangle button from the Tool Options palette if you want to reset the deformation rectangle to its original shape but keep any current deformations.
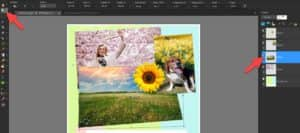
Using the Pick tool with Multiple Layers
These Pick tool options are especially useful if you are working with multiple layers.
- Open the Layers palette by going to Palettes > Layers.
- Go to Edit > Copy and then go to your background image and go to Edit > Paste as New Layer.
- Choose the layer you want to transform from the Layers palette and use the Pick tool to move, rotate, resize, and transform the layer using any of the previous methods.
Using the Pick Tool with Text/Shapes
The Pick tool is also useful when you’re adding text to an image, as you can easily move, rotate, and reposition the text exactly to your liking.
NOTE: the Tool Options are different when using the Pick tool on a vector object like Text or Shapes vs. a raster object.
If you want to use the raster tool options like Mode settings or entering an angle, you’ll need to convert the vector layer to raster first.
- To do this, right-click on the vector layer in the Layers palette and select Convert to Raster layer.
You can have fun transforming your images and making your own custom designs easily using the Pick tool in PaintShop Pro.
Download your FREE 30-day trial and make every shot your best shot with PaintShop Pro, your all-in-one photo editing and design software.
