
The Pan tool in PaintShop Pro allows you to control which part of the image is visible in the image window. In this tutorial, you will learn how to use the Pan tool and Overview palette to move around on your image, as well as helpful tips and shortcuts to speed up your photo editing workflow.
Thanks for watching! We hope you found this tutorial helpful and we would love to hear your feedback in the Comments section at the bottom of the page. You will find a written version of this tutorial below, and a printable PDF copy to download on the Download Resources tab above.
Download your FREE 30-day trial and make every shot your best shot with PaintShop Pro, your all-in-one photo editing and design software.
Download these free resources:
Written tutorial (PDF, 355 KB)
PaintShop Pro resources
Keyboard shortcuts (PDF, 173 KB)
PaintShop Pro User Guides
Partner and User websites
PaintShop Pro User Forum
Scrapbook Campus (Tips and tricks, workshops, master classes, and more)
Creation Cassel (Scripts, picture tubes, and other PaintShop Pro tools, plus weekly freebies)
PaintShop Pro Maniacs (Facebook group)
PaintShop Pro (Facebook group)
What’s New in PaintShop Pro
PaintShop Pro Tools
Getting Started in PaintShop Pro
Featured products
 PaintShop Pro 2023 Ultimate
 AI HDR Studio 3.0
 PaintShop Pro 2023
 Vision FX 2.0
How to Pan in PaintShop Pro
In this tutorial, you’ll learn about how to use the Pan tool to pan around an image. When you are zoomed in on a photo, you can drag with the pan tool to view another area within the photo.
The Pan tool is especially useful if you are editing fine details on a photograph and need to work with a closely zoomed in image.
How to Use the Pan Tool
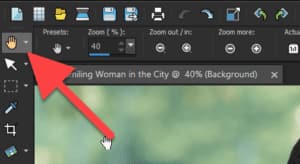
- Select the hand icon at the top of the Tools toolbar or press A on your keyboard to select the Pan tool.
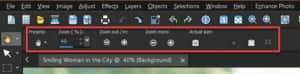
There are a few zoom options available on the Tool Options palette.
- Adjust the zoom level by using the slider or the Zoom In/Out buttons.
- Click the 1:1 button to zoom the image to 100% or click on the Fit Image to Window button to view the entire image on your screen.
To pan around your image, click and drag your mouse to the area of the image you want to view.
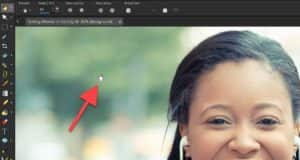
Scroll your mouse wheel forward and backwards to quickly zoom in and out as you pan around the image.
TIP: If you want to quickly pan to a different part of your image while you are using another tool, you can hold down the spacebar to pan while you have another tool activated without having to switch tools.
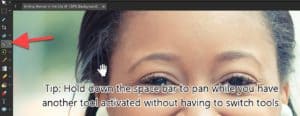
Simply release the spacebar to stop panning and return to the tool you have activated.
Panning with the Overview Palette
- Go to View > Palettes > Overview or by pressing F9 on your keyboard. Drag the preview rectangle to a new position on the overview palette.

Panning with Arrow Keys
- Use the arrow keys on your keyboard to move the image by small increments.
- Hold down the CTRL key while using the arrows to move in slightly larger increments.
- Hold down the Shift key for even larger increments.
- Hold down both CTRL + Shift for largest increments.
Alternatively, use the Page Up, Page Down, Home, and End keys to move the image by large increments.
Using these different Pan tool options will make your editing process much faster without having to zoom in and out each time you want to edit a different part of your image.
Download your FREE 30-day trial and make every shot your best shot with PaintShop Pro, your all-in-one photo editing and design software.
