
Once you’ve mastered the basics of creating and applying masks, there’s another level to explore! This tutorial will guide you through the steps of using the selection tools to define a selection area on your image and then turn it into a mask. You will also learn how to use the brush tools to hand-paint your own mask shapes.
Thanks for watching! You will find a written version of this tutorial below, and a printable PDF copy to download on the Download resources tab above.
Download your FREE 30-day trial and make every shot your best shot with PaintShop Pro, your all-in-one photo editing and design software.
Download these free resources:
Written tutorial (PDF, 1.2 MB)
Sample images (Zip, 2.6 MB)
PaintShop Pro resources
Keyboard shortcuts (PDF, 173 KB)
PaintShop Pro User Guides
Partner and User websites
PaintShop Pro User Forum
Scrapbook Campus (Tips and tricks, workshops, master classes, and more)
Creation Cassel (Scripts, picture tubes, and other PaintShop Pro tools, plus weekly freebies)
PaintShop Pro Maniacs (Facebook group)
PaintShop Pro (Facebook group)
What’s new in PaintShop Pro
Working with masks
PaintShop Pro tools
Featured products
 PaintShop Pro 2023 Ultimate
 AI HDR Studio 3.0
 PaintShop Pro 2023
 Vision FX 2.0
Creating masks from selections and brush strokes
This tutorial explores advanced masking concepts, using PaintShop Pro’s Selection tools and Paint Brush tool to create masks.
Creating a selection
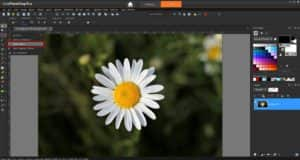
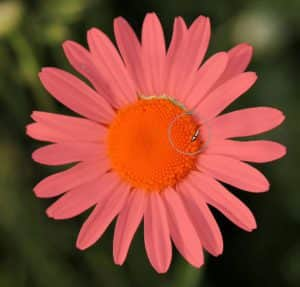
We will begin with using a selected object in a photo to create a new mask. Open the Daisy photo in the Edit workspace. Activate the Magic Wand brush from the Selection tool group.
On the Property bar, set the selection Mode to Add, Tolerance to 30 and uncheck Contiguous.

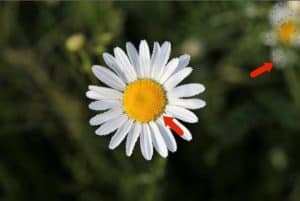
Click on one area of the flower and the Magic Wand will select all pixels of similar color. If you click on any areas that were missed, they will be added to the selection along with any matching pixels.
With this particular image, there are areas outside the daisy that have been selected as well, because they are close in color to the petals.
You could keep trying to adjust your selection by changing the Mode, Tolerance and other settings. But you can also use Edit Selection mode to perfect your selection.
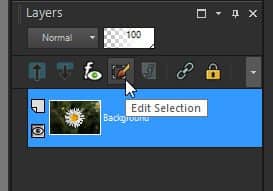
With the selection marquee still active, click on the Edit Selection icon in the Layers palette.
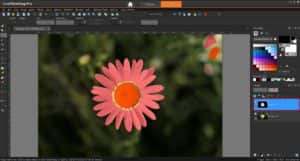
When Edit Selection mode is activated you will see a red overlay indicating what’s currently included in the selection area. This creates a new temporary layer as well, on which you can modify what’s selected. This layer is black and white, with white representing what’s selected.
We will use the Paint Brush tool to pick up the unselected bits in the center.
- In the Materials palette, set the Foreground (top) swatch to white.
- Activate the Paint Brush tool and choose the Default brush tip.
- Now use it to brush over the unselected areas.
Tip: for smaller areas, you can change the brush size by holding down the Alt key while dragging the brush.
To remove the extraneous selected areas outside the flower, switch the Foreground swatch to black and use the Paint Brush tool to paint over the areas you want to remove. Once you are finished perfecting your selection, click the Edit Selection icon again to exit. Keep the selection marquee active – it now includes the entire flower and nothing else.
To soften and round out this mask shape, go to Selections > Modify > Expand.
In the Before/After preview windows, pan to an edge of the flower where you can see the narrow spaces between petals – these we want to get rid of. Increase the Number of Pixels until the gaps are filled in.
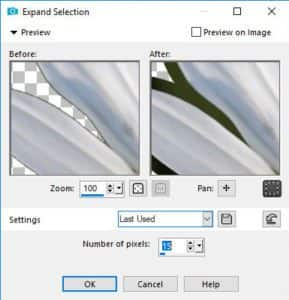
Pan around the selection border to make sure it looks ok everywhere. Then click OK to see the expanded marquee.

Creating a mask from a selection
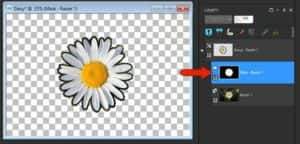
Now we are going to create a mask from the daisy selection. Click the New Mask Layer icon in the Layers palette and choose Show Selection. The mask appears in the mask layer group, with white representing the area that will show and black for what’s blocked.
Tip: If you want to blur the mask edges, first unselect with Ctrl + D. Then choose Adjust > Blur > Gaussian Blur.
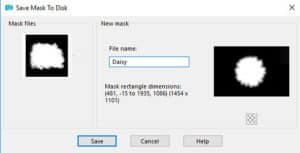
To save the mask, make sure its layer is still selected and go to Layers > Load/Save Mask > Save Mask To Disk. Name it “Daisy.”
Applying a selection mask
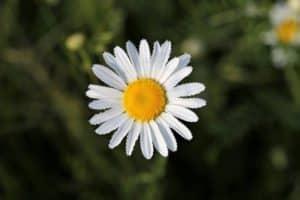
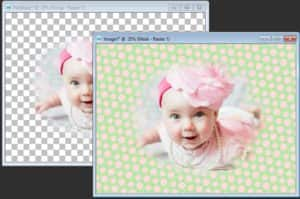
To apply the new daisy mask you created, open the PinkBaby sample photo, or any photo you like.
- Go to Layers > Load/Save Mask > Load Mask From Disk.
- Select the daisy mask.
- Set the Orientation to As Is and choose the Hide all mask option.
- Click Load to see your new mask applied to the photo.
- If necessary, use the Pick tool to adjust the mask size and placement.

Tip: for a creative option, add a new Raster layer below the mask group layer. Use the Flood Fill tool to fill with a color or textured background or copy and paste a background image onto the new layer.
Creating brush strokes
To demonstrate creating a mask from brush strokes we will start with a new image.
- Go to File > New and set the image size to 1024 x 800 pixels.
- Activate the Flood Fill tool and fill the image with black.
- Change the Foreground swatch to white.
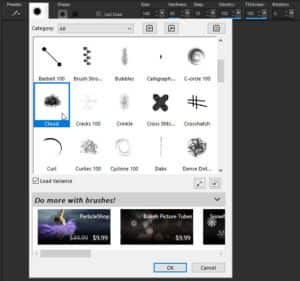
- Activate the Paint Brush tool and click on the brush tip in the Property bar to open the brush library.
In the brush library you will see many more brush shape options. In this example we are using the Cloud brush tip.
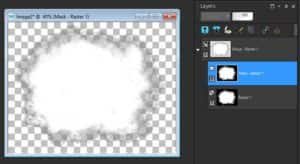
Now use the Cloud brush tip to “paint” your mask area. There are many options to experiment with:
- Click once for one brush dab.
- Click and drag to fill in a larger area.
- Adjust the brush size by holding down the Alt key while dragging the mouse.
- Click on top of existing brush strokes to make the white area larger and more opaque.
- Randomize the strokes by changing the Rotation, Size and other parameters on the Property bar.

Creating a new mask from brush strokes
Once you are satisfied with your brush strokes you can turn the image into a mask. Here is the easiest way to do this:
- Click on the New Mask Layer icon in the Layers palette and select From Image.
- In the Source Window choose this new image you created and click OK.
- In the Layers palette, make sure the mask layer is active.
- Go to Layers > Load/Save Mask > Save Mask To Disk and name it Cloud.
Applying a brush stroke mask
In this example we are using a wedding photo and a raindrop pattern image to show off our cloud brush mask. We’ll apply the mask to the wedding photo, which will allow the rain pattern image to show through around the edges.
- Open the sample photos RainyWedding and RainWindow.
- Copy (Ctrl + C or Edit > Copy) the wedding image and paste it into the rainy window image (Ctrl + V or Edit > Paste as New Layer).
- In the Layers palette, the wedding image should be the top layer, and the active layer.
- Go to Layers > Load/Save Mask > Load Mask From Disk.
- Select the cloud mask you created and set the Orientation as Fit to Canvas.
- Click Load.

Want more brush tips? Open the Welcome Book and go to the Get More section. On the Creative Content tab, scroll down to find the Creative Brush Pack that has 30 free brushes you can download.
Download your FREE 30-day trial and make every shot your best shot with PaintShop Pro, your all-in-one photo editing and design software.
