
Transform the creativity of free form sketching into precise vector curves directly on a pen-enabled device. Using the innovative LiveSketch tool, your strokes are adjusted and combined with existing vector curves, allowing you to sketch and design on the fly. Best of all, you’ll eliminate the time-consuming task of sketching on paper, scanning and tracing to vector with this revolutionary new tool.
The LiveSketch tool is only available in CorelDRAW versions 2017 and higher. LiveSketch is not included in the Home & Student edition of CorelDRAW Graphics Suite.
Thanks for watching! We hope you found this tutorial helpful and we would love to hear your feedback in the Comments section at the bottom of the page. You will find a written version of this tutorial below, and a printable PDF copy to download on the Download Resources tab above.
Start your FREE 15-day trial and embark on a design journey with powerful tools for vector illustration, layout, photo editing, typography, and collaboration.
Download these free resources:
Written tutorial (PDF, 322 KB)
CorelDRAW Graphics Suite resources
Quick Start Guide (PDF, 2 MB)
Keyboard Shortcuts (PDF, 3.5 MB)
CorelDRAW and Corel PHOTO-PAINT user guides
For CorelDRAW Graphics Suite subscription and perpetual licenses (2018 to 2024), languages include English, Português do brasil, 简体中文, 繁體中文, Čeština, Deutsch, Español, Français, Italiano, 日本語, Polski, Русский
CorelDRAW Community
CorelDRAW learning center
Facebook
X (formerly Twitter)
YouTube
What’s New in CorelDRAW Graphics Suite
CorelDRAW Tools
 CorelDRAW Graphics Suite
 Ultimate Vector Bundle Vol. 1
 CorelDRAW Standard 2021
 Ultimate Vector Bundle Vol. 2
 Corel Vector
How to Use LiveSketch
CorelDRAW’s LiveSketch tool uses a sophisticated neural network to instantly output an editable vector image from your freehand sketches. Use your cursor directly in a CorelDRAW document or connect a sketching tablet for more freedom.
Click on any of the images below to view full-size.

As you draw, LiveSketch adjusts curves based on your sketching technique, and even learns and adapts to your individual style. No matter how you draw, LiveSketch can help you create editable, professional quality sketches without the need to scan or trace.
Step 1: LiveSketch Configuration
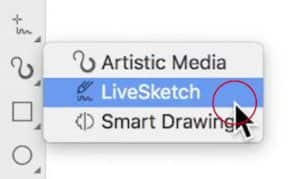
Select the LiveSketch tool on the toolbar.
Timer
In the Properties bar, adjust the Timer to allow yourself more time to manipulate your strokes before LiveSketch turns your free hand into a vector curve. We recommend starting with 5 seconds. As your experience with LiveSketch grows, you may adjust the timer up or down depending on your drawing style.

Curves
To start, turn off the Add Existing Curves button, and turn on the Single Curve button. This will allow you to continue sketching around your original curve to adjust it, rather than creating new curves.
Use the Smoothness spin box to adjust the amount which LiveSketch will smooth out your curves, with 100 being the most and 0 being not at all.
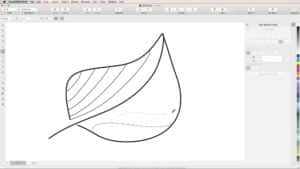
Step 2: Sketching with LiveSketch
Once you have configured LiveSketch to your liking, simply start to draw! With the timer set at 5 seconds, you should have plenty of time to smooth out your lines.
- To complete a curve and reset the timer, hit Return on your keyboard at any time.
- To create new curves without hitting Return, simply turn Single Curve off in the Properties bar.
- To edit curves you have already created, turn Add Existing Curves on in the Properties bar.
Step 3: Editing LiveSketch Curves
When you are finished using LiveSketch, edit your creations just like you would any other curves in CorelDRAW!

Now you know how to get started with LiveSketch. Time to get drawing!
Start your FREE 15-day trial and embark on a design journey with powerful tools for vector illustration, layout, photo editing, typography, and collaboration.
