
Looking for some amazing new effects for your artwork? Learn how to use Art Style effects, brought to you by artificial intelligence. These non-destructive effects are based on the analyzed aesthetic of an artist or genre, and you can control the intensity and level of detail in order to produce stunning results.
Thanks for watching! We hope you found this tutorial helpful and we would love to hear your feedback in the Comments section at the bottom of the page. You will find a written version of this tutorial below, and a printable PDF copy to download on the Download Resources tab above.
Looking for some amazing new effects for your artwork? With CorelDRAW 2020 comes a new set of Art Style effects, brought to you by artificial intelligence. These non-destructive effects are based on the analyzed aesthetic of an artist or genre, and you can control the intensity and level of detail in order to produce stunning results.
Thanks for watching! We hope you found this tutorial helpful and we would love to hear your feedback in the Comments section at the bottom of the page. You will find a written version of this tutorial below, and a printable PDF copy to download on the Download Resources tab above.
Start your FREE 15-day trial and embark on a design journey with powerful tools for vector illustration, layout, photo editing, typography, and collaboration.
Download these free resources:
Written tutorial for Windows (PDF, 1.1 MB)
Written tutorial for Mac (PDF, 946 KB)
CorelDRAW Graphics Suite resources
Quick Start Guide (PDF, 2 MB)
Keyboard Shortcuts (PDF, 3.5 MB)
CorelDRAW and Corel PHOTO-PAINT user guides
For CorelDRAW Graphics Suite subscription and perpetual licenses (2018 to 2024), languages include English, Português do brasil, 简体中文, 繁體中文, Čeština, Deutsch, Español, Français, Italiano, 日本語, Polski, Русский
CorelDRAW Community
CorelDRAW learning center
Facebook
X (formerly Twitter)
YouTube
What’s New in CorelDRAW Graphics Suite
CorelDRAW Tools
 CorelDRAW Graphics Suite
 Ultimate Vector Bundle Vol. 1
 CorelDRAW Standard 2021
 Ultimate Vector Bundle Vol. 2
 Corel Vector
Apply AI-based Effects to Bitmaps and Vectors
Let’s explore the new, non-destructive Art Style effects introduced in CorelDRAW 2020. Each effect is based on the analyzed aesthetic of an artist or genre, and you can control the intensity and level of detail in order to produce stunning results.
Exploring the New Art Style Effects
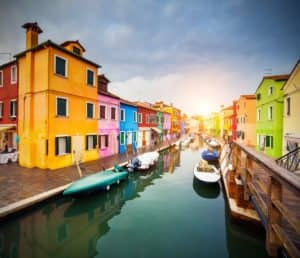
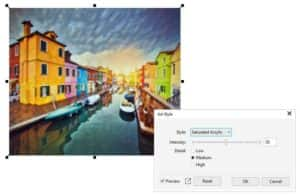
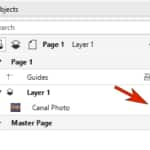
We’ll start with this photo of colorful houses, imported into a new CorelDRAW document and demonstrate some of the new Art Style effects.
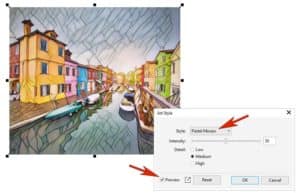
With the image selected, you can find the art effects in Effects > Creative > Art Style.
Move the Art Style window off to the side and keep Preview checked, so that you can see what the effects will do.
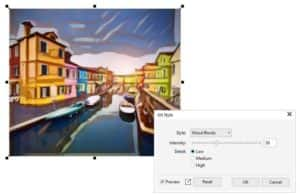
Pastel Mosaic
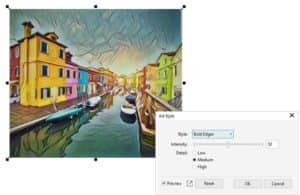
Bold Edges
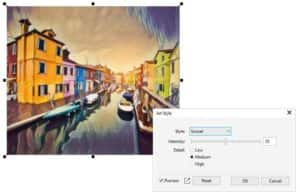
Sunset
Saturated Acrylic
This is Wood Blocks, with the default settings of medium Intensity and medium Detail.
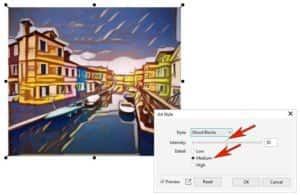
Increasing the Intensity really exaggerates the effect, and increasing the Detail increases the frequency of brush strokes.
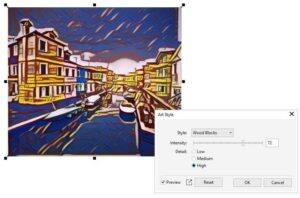
Lowering the Intensity brings back more of the original photo and lowering the Detail results in wider spaces between brush strokes.
Like other effects in the Effects menu, art style effects are non-destructive, which means the original photo remains intact. In the Objects docker there is an FX icon next to the image, which you can click to toggle the effect off or back on.
If you return to the Art Styles menu and choose a different effect, you would be replacing the effect, not adding a new effect on top of the existing one.
You can also see the effect in the FX tab of the Properties docker. Here it’s the Visibility (eye) icon that toggles the effect on and off.
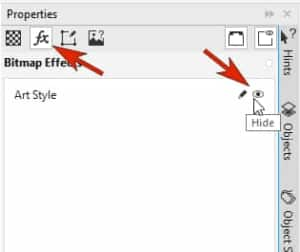
If you double-click the effect, or click its Edit icon, you can adjust settings or switch to a different style.
Applying Art Style Effects to Objects or Groups
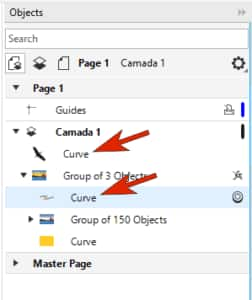
Art style effects can be applied to vector objects as well. In this artwork by Raul Cabral Mera, there is one group for the bird and wavy curve across the sky, and another group for the sky, water, and buildings.
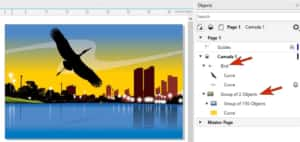
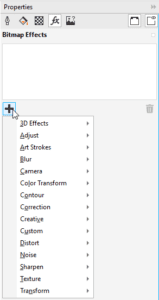
We select everything and open the Properties docker to the FX tab. Clicking the Plus sign in this docker opens same menu of effects available in the Effects menu.
In this example, the Lava Lamp art style was applied, with medium intensity and detail.
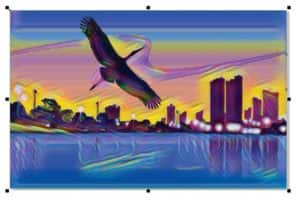
Note that this effect is most pronounced around the curves where objects overlap with other objects, like around the bird and buildings. The effects stay within their groups however – there are no wavy effects along where the two groups overlap.
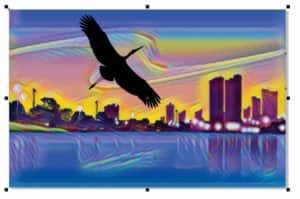
Now say you want to apply this effect to everything but the bird. With the bird group ungrouped, the bird curve is now a separate object. And the sky curve was moved into the background group so that its edges will be part of the background.
With everything but the bird selected, we apply the same effect. The entire background gets the effect uniformly, and the bird stands out above it all.
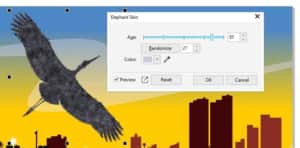
Now let’s apply effects only to the bird. Although you can’t apply multiple art effects to the same object, you can combine art effects with other types of effects. With just the bird selected, add a Texture > Elephant Skin effect.
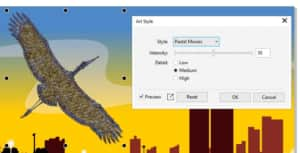
On top of this, we can add an art style, such as Pastel Mosaic.
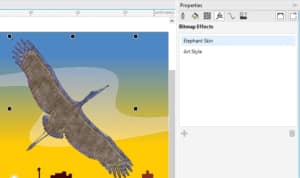
You can toggle off the texture effect to see how different the art effect looks without it.
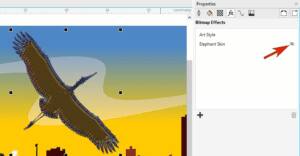
After turning the texture effect back on, you can also drag effects to reorder, to see what happens if the art style had been applied first.
Finally, you can apply these styles to other objects. With both effects selected, drag them onto another object – the tall buildings in this example.

Start your FREE 15-day trial and embark on a design journey with powerful tools for vector illustration, layout, photo editing, typography, and collaboration.
