
With CorelDRAW you can use lenses to apply bitmap effects to objects and change their appearance without actually changing the object itself. In this tutorial we’ll show you how to create, modify and manipulate lenses, how to copy a lens effect from one object to another, and how to use the Feather effect for seamless blending.
Thanks for watching! You will find a written version of this tutorial below, and a printable PDF copy to download on the Download resources tab above.
With CorelDRAW you can use lenses to apply bitmap effects to objects and change their appearance without actually changing the object itself. In this tutorial we’ll show you how to create, modify and manipulate lenses, how to copy a lens effect from one object to another, and how to use the new Feather effect for seamless blending.
Thanks for watching! We hope you found this tutorial helpful. You will find a written version of this tutorial below, and a printable PDF copy to download on the Download Resources tab above.
Start your FREE 15-day trial and embark on a design journey with powerful tools for vector illustration, layout, photo editing, typography, and collaboration.
Download these free resources:
Written tutorial for Windows (PDF, 1.04 MB)
Written tutorial for Mac (PDF, 1.16 MB)
CorelDRAW Graphics Suite resources
Quick Start Guide (PDF, 2 MB)
Keyboard Shortcuts (PDF, 3.5 MB)
CorelDRAW and Corel PHOTO-PAINT user guides
For CorelDRAW Graphics Suite subscription and perpetual licenses (2018 to 2024), languages include English, Português do brasil, 简体中文, 繁體中文, Čeština, Deutsch, Español, Français, Italiano, 日本語, Polski, Русский
CorelDRAW Community
CorelDRAW learning center
Facebook
X (formerly Twitter)
YouTube
What’s new in CorelDRAW Graphics Suite
CorelDRAW tools
Adding effects in CorelDRAW
 CorelDRAW Graphics Suite
 Ultimate Vector Bundle Vol. 1
 CorelDRAW Standard 2021
 Ultimate Vector Bundle Vol. 2
 Corel Vector
Applying bitmap effects in interactive lenses
Lenses enable you to apply a variety of different effects to an object or image area, without actually changing the object or area itself. In CorelDRAW 2020 you can now apply any bitmap effect as a lens using AI technology. You can also move or manipulate the lens, giving you the freedom to experiment or position the bitmap effect with precision in your design.
Click on any of the images below to view full-size.
How to create a lens
We’ll start by creating a lens for the orange sunglasses in this photo that we’ve imported into a new CorelDRAW document.

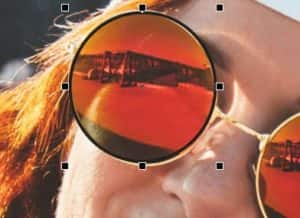
Select the Ellipse tool from the left toolbar to create the lens shape. Hold down Ctrl and Shift, and click and drag to draw it out from the center. Move it into place and adjust it to fit.
Right-click on the no-color swatch on the Color palette to remove the ellipse outline.
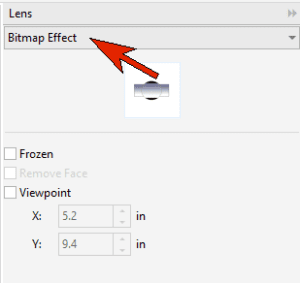
To open the Lens docker, go to Window > Dockers > Effects > Lens.
In addition to the lens effect options in previous versions, such as Brighten, Heat Map and Invert, there is now Bitmap Effect. Select this type of lens.
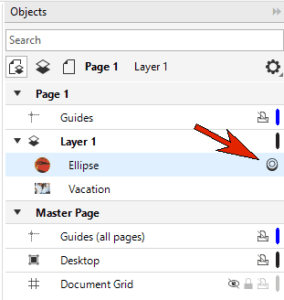
Now you can choose the actual bitmap effect to apply. Back in the Objects docker, we can see that this ellipse is now a lens.
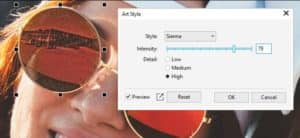
From the Effects menu, we’ll try a Creative > Art Style effect, using the Sienna style with high detail and intensity.
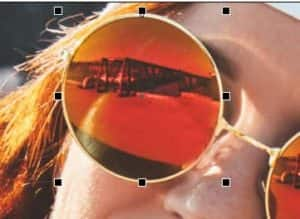
To apply the same lens to the other side of the sunglasses, simply press Ctrl + D to duplicate it. As you move the copied lens around, whatever is below the lens (in this example, the band of the hat) gets the same bitmap effect.
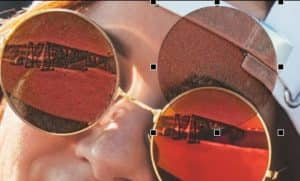
We’ll place the copied lens within the second frame of the glasses and adjust as needed.

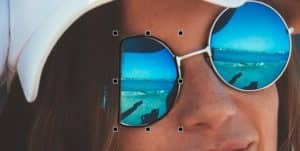
To place a lens above the blue sunglasses, the Ellipse tool won’t work on the left side. So we switch to the Bézier tool and trace around the visible part of this side of the glasses, and double-click to close the curve.
As before, we click on the no-color swatch to remove the curve outline.
How to copy a lens effect with the Attributes Eyedropper
To copy the properties from the previous lens onto this curve, activate the Attributes Eyedropper. In the property bar, under Effects, select both Lens and Bitmap Effects to copy their attributes.
Click the Sienna-effect lens to sample its attributes and drop them into the new curve.

How to edit a lens effect
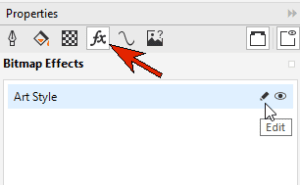
The Sienna art style doesn’t work as well for these glasses, so open the Properties docker (Window > Dockers > Properties) to the FX tab, and double-click the Art Style effect in order to edit it.
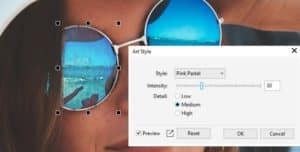
Pink Pastel with lower intensity and detail works nicely here.
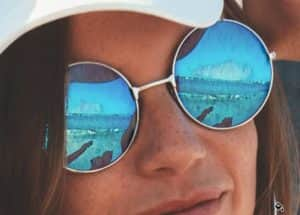
For the other eye, select one of the round lenses and duplicate it, move it into place, and use the Attributes Eyedropper to copy the Pink Pastel lens attributes.
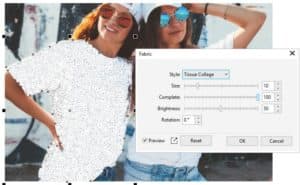
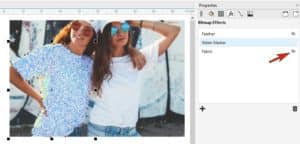
Another way to apply a lens is to trace the area you want to define. To apply a lens to one of the white t-shirts, we activate the Freehand tool and carefully trace around the outer edge of the t-shirt.

Remove the outline and use the Lens docker to add a Bitmap Effects lens.
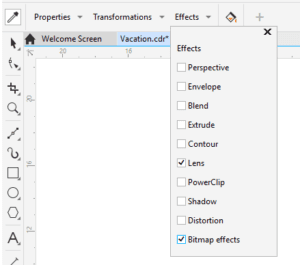
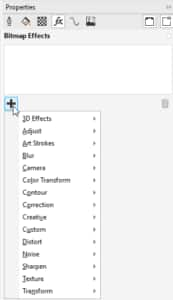
Rather than use the Effects menu, this time we’ll go straight to the FX tab of the Properties docker to show another way to add effects. Here you can use the Plus sign to open the same list of effects that appears in the Effects menu, as well as the Adjust options.
For this example, we started with a Creative > Fabric effect and chose the Tissue Collage style.
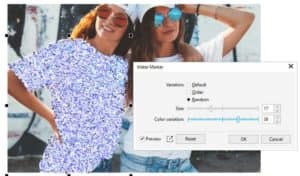
On top of that, we added an Art Strokes > Water Marker effect.
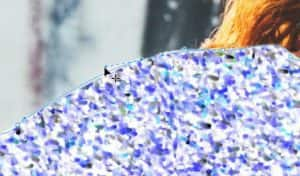
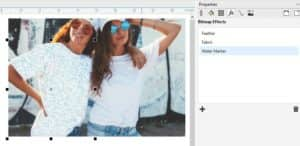
With the effects applied, it’s easier to see the spots along the lens boundary that don’t quite line up with the shirt. You can tweak this with the Shape tool, by moving nodes. Add nodes where needed by double-clicking.
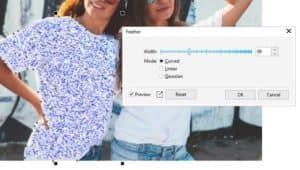
How to blend with the Feather effect
To avoid some of the painstaking work of fixing the boundary, we can use the new feathering effect. Choose Blur > Feather from the Effects menu or FX tab of the Properties docker and adjust the boundary width and mode. This increases the effect transparency along the edges, which makes the other effects blend seamlessly with the rest of the photograph.
Experimenting with lens effects
As with all bitmap effects, lens effects can be combined, re-ordered, and toggled on and off from the Properties docker.
In the FX tab, you can turn effects on and off with the Visibility (eye) icon.
You can double-click on an effect to adjust its settings or drag an effect up or down in the list to rearrange effect order.
Applying bitmap effects lens to vector objects
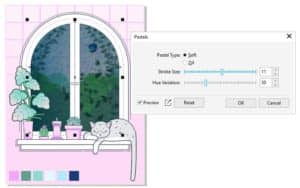
Lenses can be used to apply bitmap effects to vector objects as well. In this document, let’s apply a bitmap effects lens to the curve that defines the arch window.
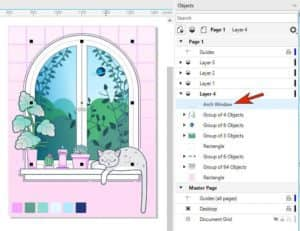
With that curve selected in the Objects docker, add a bitmap effects lens. Then add a Creative > Smoked Glass effect to darken and blur a bit.
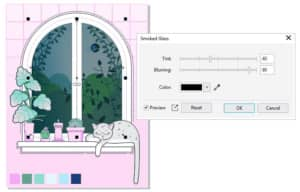
Then choose an Art Strokes > Pastels effect to add a painted look.
The beauty of working with lens is that you can move and manipulate them to freely position effects with precision in your designs. And with Bitmap Effects now available in CorelDRAW 2020 and higher, you have a wide variety of styles that you can explore and combine with other effects to create your own unique look.
Start your FREE 15-day trial and embark on a design journey with powerful tools for vector illustration, layout, photo editing, typography, and collaboration.

Comments (1)
Reader Interactions
Comments
This tutorial was quick however the Narator’s voice was crisp and clear…very easy to listen to. I also like the additional step-by-step section below this video.