
In this tutorial, we’ll show you a simple design process for creating custom gift tags in CorelDRAW. The example we are using is holiday-themed, but you could use this process to make tags or labels for any occasion or project. You’ll learn how to set up your CorelDRAW document for printing on a template, plus how to add a background, border, design elements, and text. Download the free creative elements from the Download resources tab above and get started today!
Thanks for watching! You will find a written version of this tutorial below, and a printable PDF copy to download on the Download resources tab above.
Start your FREE 15-day trial and embark on a design journey with powerful tools for vector illustration, layout, photo editing, typography, and collaboration.
Download these free resources:
Written tutorial (PDF, 942 KB)
VectorStock design elements (Zip file, 10.6 MB) This file was provided by VectorStock
CorelDRAW Graphics Suite resources
Quick Start Guide (PDF, 2 MB)
Keyboard Shortcuts (PDF, 3.5 MB)
CorelDRAW and Corel PHOTO-PAINT user guides
For CorelDRAW Graphics Suite subscription and perpetual licenses (2018 to 2024), languages include English, Português do brasil, 简体中文, 繁體中文, Čeština, Deutsch, Español, Français, Italiano, 日本語, Polski, Русский
CorelDRAW Community
CorelDRAW learning center
Facebook
X (formerly Twitter)
YouTube
What’s new in CorelDRAW Graphics Suite
Creative design projects
CorelDRAW tools
 CorelDRAW Graphics Suite
 Ultimate Vector Bundle Vol. 1
 CorelDRAW Standard 2021
 Ultimate Vector Bundle Vol. 2
 Corel Vector
Creating custom gift tags in CorelDRAW
In this tutorial, we’ll show you a simple design process for creating custom gift tags in CorelDRAW. The example we are using is holiday-themed, but you could use this process to make tags or labels for any occasion or project.
Click on any of the images to view full-size.
Document setup
Before you begin, you should consider the options for printing your gift tags. You can use a printing service or print them at home using regular paper or sheets of tags or labels you’ve purchased. The document size will be based on your printing method. Our example is based on an Avery template that has fourteen 4” x 1.3” labels per page.
Go to File > New or choose New Document on the Get Started tab of the Welcome Screen. In the Create a New Document window, set the Resolution to 300 dpi. The page dimensions can be anything, as we will be setting our page size in the next step. Click OK.
To find the label template we’ll be using, go to Layout > Page Size and click on the Label presets option. This gives you a list of many different label brands and types to choose from. The one we’re using is under Avery Laser/Ink: #5162 with space for 14 labels sized 1.3” x 4”. Select the template you want to use and click OK.
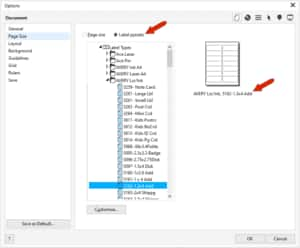
After clicking OK, the page size changes to match the label size.
Before we start creating the label, we’ll also open a file of decorative elements that we’ll be using. This file is available to download on the Download Resources tab at the top of the tutorial page. This free vector content was provided by VectorStock.
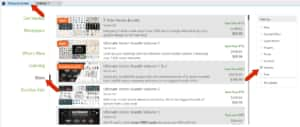
If you are looking for something different, CorelDRAW has a wealth of content such as clip art, borders, fill patterns, and more. You can find this by going to the Welcome Screen and clicking Store or Get More depending on the version you’re using. Choose a filter if you want and browse the options. Filtering by Vectors will produce a list of vector content, which is scalable and easy to use in CorelDRAW.
In this example, we’ll be using a CorelDRAW file with a set of holiday symbols in vector format. You can bring in a saved file by using the Import icon, then place the imported file off to the side.
Adding a border and fill color
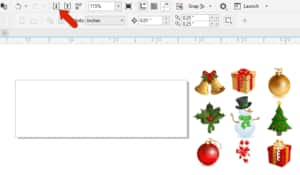
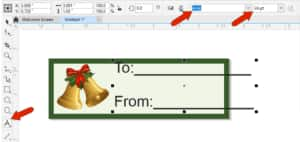
To define the page border, the easiest way is to double-click the Rectangle tool icon in the Toolbox.

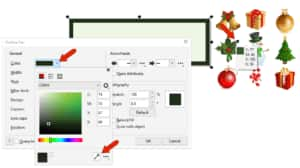
For the color of the body of the label, you can click a swatch on the Color palette along the right. Or, to choose a color more precisely, double-click the Fill swatch at the right side of the status bar along the bottom of the drawing window. In the Edit Fill window, choose Uniform Fill, switch to Color viewers, and choose your color, a light green in our example.
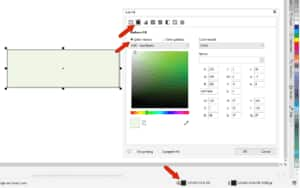
To create a frame around the label, double-click the Outline swatch on the status bar. In the Outline Pen dialog box, set the Width to 8pt and choose Inside Outline for the Position.
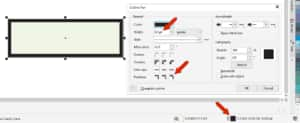
For the outline color, you can select a color in the color window or use the Color eyedropper to sample a color from the decorative elements.
Adding the holiday graphics
To add one of the holiday designs to the label, activate the Pick tool, select the object, and move it into place on the label.
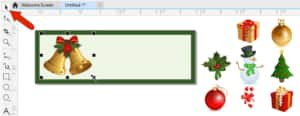
If you want to rotate the object, click on it again to display the rotation handles, which you can use to turn the symbol a bit.
Clicking on the object again brings back the move and sizing handles, which you can use to adjust the size and position if necessary.
Adding text
Let’s now add a simple “To / From” text to the right. Activate the Text tool on the Toolbox, click where you want to start, and type your text. Press Enter for line breaks and click in blank space when finished.
To make changes, use the Pick tool to select the text, and then use the options on the property bar to change the font and adjust the size and other text formatting options.
For the text color, you can click a swatch on the Color palette, or double-click the Fill swatch in the status bar if you want more color options or to use the Color eyedropper to match a color in one of the holiday graphics.

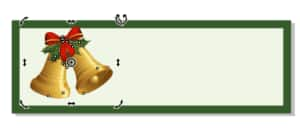
To center both the text and the graphic, with Pick tool still active, hold down the Shift key and select both the text and the graphic. Then under the Object menu choose Align and Distribute > Center to Page Vertically.
Now this label is finished. But for a little variety in our gift labels, let’s create a couple more, each with a different holiday graphic. When each label is on its own page, filling the template later will be a breeze.
Use the drop-down arrow beside the Page 1 tab at the bottom of the document and select Duplicate Page.
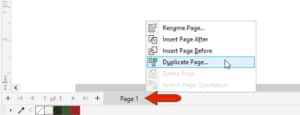
In the Duplicate Page window that pops up, choose Copy layer(s) and their contents so that all the design elements and text will be copied.
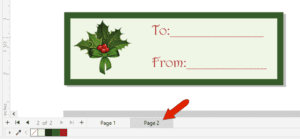
Now on Page 2, select and delete the holiday graphic and replace it with a different graphic. As before, you can use the Pick tool to resize, reposition, and rotate the graphic as needed. Don’t forget to realign the text and graphic by selecting both of them and going to Object > Align and Distribute > Center to Page Vertically.
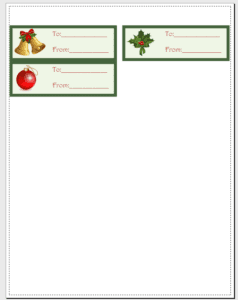
You can repeat this process to make as many different labels as you like. And you’re not limited to just changing the holiday graphic. You can change the fill and/or border color, choose a different line style for the border, change the font or text color, etc. on any of the duplicate pages.
NOTE: if the extra holiday graphics are still present on each page, you can leave them there – they won’t print since they’re outside the page border.
Printing the labels
Before you print, make sure you have saved a copy of this file in CDR format to preserve the layers and pages in case you want to make changes in the future.
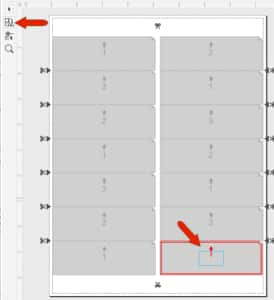
When you’re ready to print, go to File > Print Preview. The template is already defined, and the 3 labels we created on separate pages have automatically been placed in the first three slots.
To configure the rest of the slots, click the Imposition Layout Tool icon. Each slot is numbered from 1 to 14, where each number corresponds to a page number. Since we only have 3 pages, we need to replace the higher numbers by clicking each one and replacing it with 1, 2, or 3.
Now when you switch back to the Pick tool, the slots are all filled in with several copies of each label.
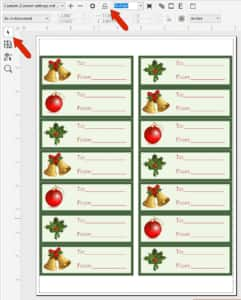
And if all looks ready to go, the Print button is right in the toolbar. Now that you know the basic steps in creating custom gift tags, have fun making your own tags and labels!
Start your FREE 15-day trial and embark on a design journey with powerful tools for vector illustration, layout, photo editing, typography, and collaboration.
