Start your FREE 15-day trial and embark on a design journey with powerful tools for vector illustration, layout, photo editing, typography, and collaboration.
Download these free resources:
Written tutorial (PDF, 869 KB)
CorelDRAW Graphics Suite Resources
Quick Start Guide (PDF, 2 MB)
Keyboard Shortcuts (PDF, 3.5 MB)
CorelDRAW and Corel PHOTO-PAINT user guides
For CorelDRAW Graphics Suite subscription and perpetual licenses (2018 to 2024), languages include English, Português do brasil, 简体中文, 繁體中文, Čeština, Deutsch, Español, Français, Italiano, 日本語, Polski, Русский
What’s new in CorelDRAW Graphics Suite
CorelDRAW tools
Creative design projects
By Anna María López López
In this written tutorial you will learn how to create a psychedelic-style background using mainly the Graph Paper tool and the Artistic Media tool to create a “rainbow” brush stroke.
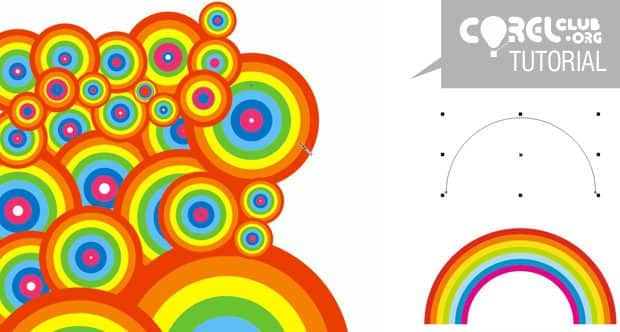
Among all the great art movements that characterized the seventies, it is worth stressing the influence that Psychedelia had on design and graphic art. In this CorelDRAW tutorial we will create a psychedelic-style background using mainly the Graph Paper tool, and the Artistic Media tool to create a “rainbow” brush stroke.
Click on any of the images below to view full-size.
To start, in a new CorelDRAW document, you will need to create the brush stroke motif. Using the Graph Paper tool (Toolbox > Graph Paper), draw a 1-row by 7-column table. You can also activate this tool by pressing the ‘D’ key on your keyboard.
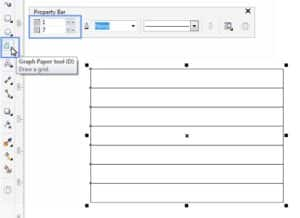
Select the table and apply a magenta color filling. Ungroup the elements using the Crl+U shortcut. Once the table elements have been ungrouped, select them all and delete their black outlines by right clicking on the “No Color” well (X) in the Color Palette.
Click on each one of the rectangles that formed your table and apply a fill color from the Color Palette. In order to get a more psychedelic effect, in this example we have chosen the rainbow colors.
You now have the base motif to create the psychedelic background.

Select the 7 colored rectangles and, in the main Toolbox, click on Artistic Media and then the Brush from the Property Bar. You can also access it by pressing the ‘I’ key on your keyboard. Next, in the Artistic Media tool property bar, click on the Save Artistic Media stroke icon. In the dialog box that appears, write a name for your new brush.
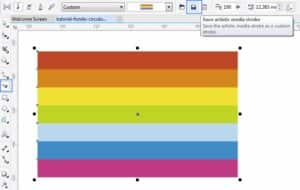
Note: By default, all brushes created with the Artistic Media Brush tool are saved into the …\Corel\CorelDRAW Graphics Suite X7\Draw\CustomMediaStrokes folder. They are saved in a *.CMX vector format.
Once you’ve created your new and colorful rainbow brush, it’s time to use it to create the background. Let’s draw several circles on the page, using the Ellipse tool (Toolbox > Ellipse).
Note: If you prefer, you can access all the available brush strokes and apply them directly on the selected objects. You can do so by opening the Artistic Media docker. In CorelDRAW X7, you can access it clicking on the Window menu > Dockers > Effects > Artistic Media.
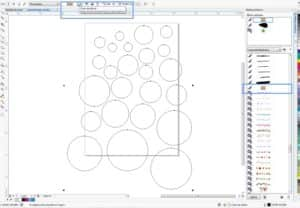
Select all the circles and activate the Artistic Media tool again. On the top Property bar, click on the drop-down list of brush strokes available for the Brush tool (select the “rainbow” brush stroke under Custom, and you will see how the brush stroke gets applied to all the circles that you have selected).
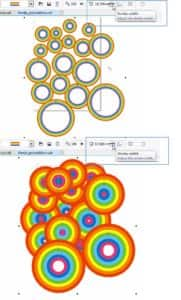
The advantage of using brush strokes for this type of exercise is that modifying the Artistic Media tool’s Stroke width you will achieve a variety of circular shapes. Try increasing or decreasing the width of the brush stroke to get similar results to the ones shown in the following image.
Keep in mind that in an effort to speed up this exercise you’ve been instructed to apply the brush stroke simultaneously to all the circles. However, at any point you can select each circle separately and change its width to obtain new and varied circular combinations.
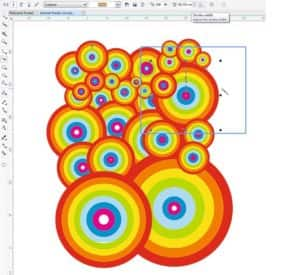
To finish, you can crop your final composition in a rectangular shape using the powerful CorelDRAW Crop tool (Toolbox > Crop tool). Remember to double-click in the center of the selected area in order to perform the cropping operation.
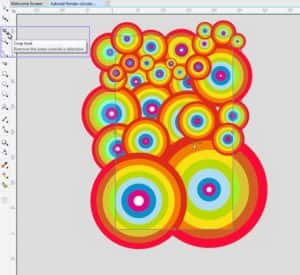
The advantage of creating the psychedelic background in this way is that the circles are independent from each other. This will allow you to move them freely in order to add new objects.
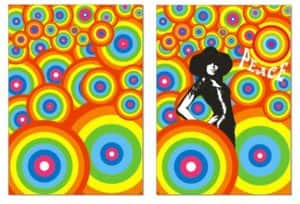
You will also be able to add color to future projects with the new and colorful brush stroke that you just created… or simply draw as many rainbows as you wish!
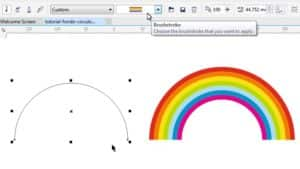
Draw an Arc with the Ellipse tool and apply this brush stroke to get an instant rainbow.
This tutorial has been produced by Anna María López López – multidisciplinary designer, founder of www.corelclub.org and author of numerous digital design books such as Curso Diseño Gráfico, Fundamentos y Técnicas.
 CorelDRAW Graphics Suite
 Ultimate Vector Bundle Vol. 1
 CorelDRAW Standard 2021
 Ultimate Vector Bundle Vol. 2
 Corel Vector
Start your FREE 15-day trial and embark on a design journey with powerful tools for vector illustration, layout, photo editing, typography, and collaboration.

